

You can find Blockops quick start guides here: Getting Started with Blockops
Create a Node
ClickConnect to select SSV on Blockops and select the network you want to create a node on Mission Control.
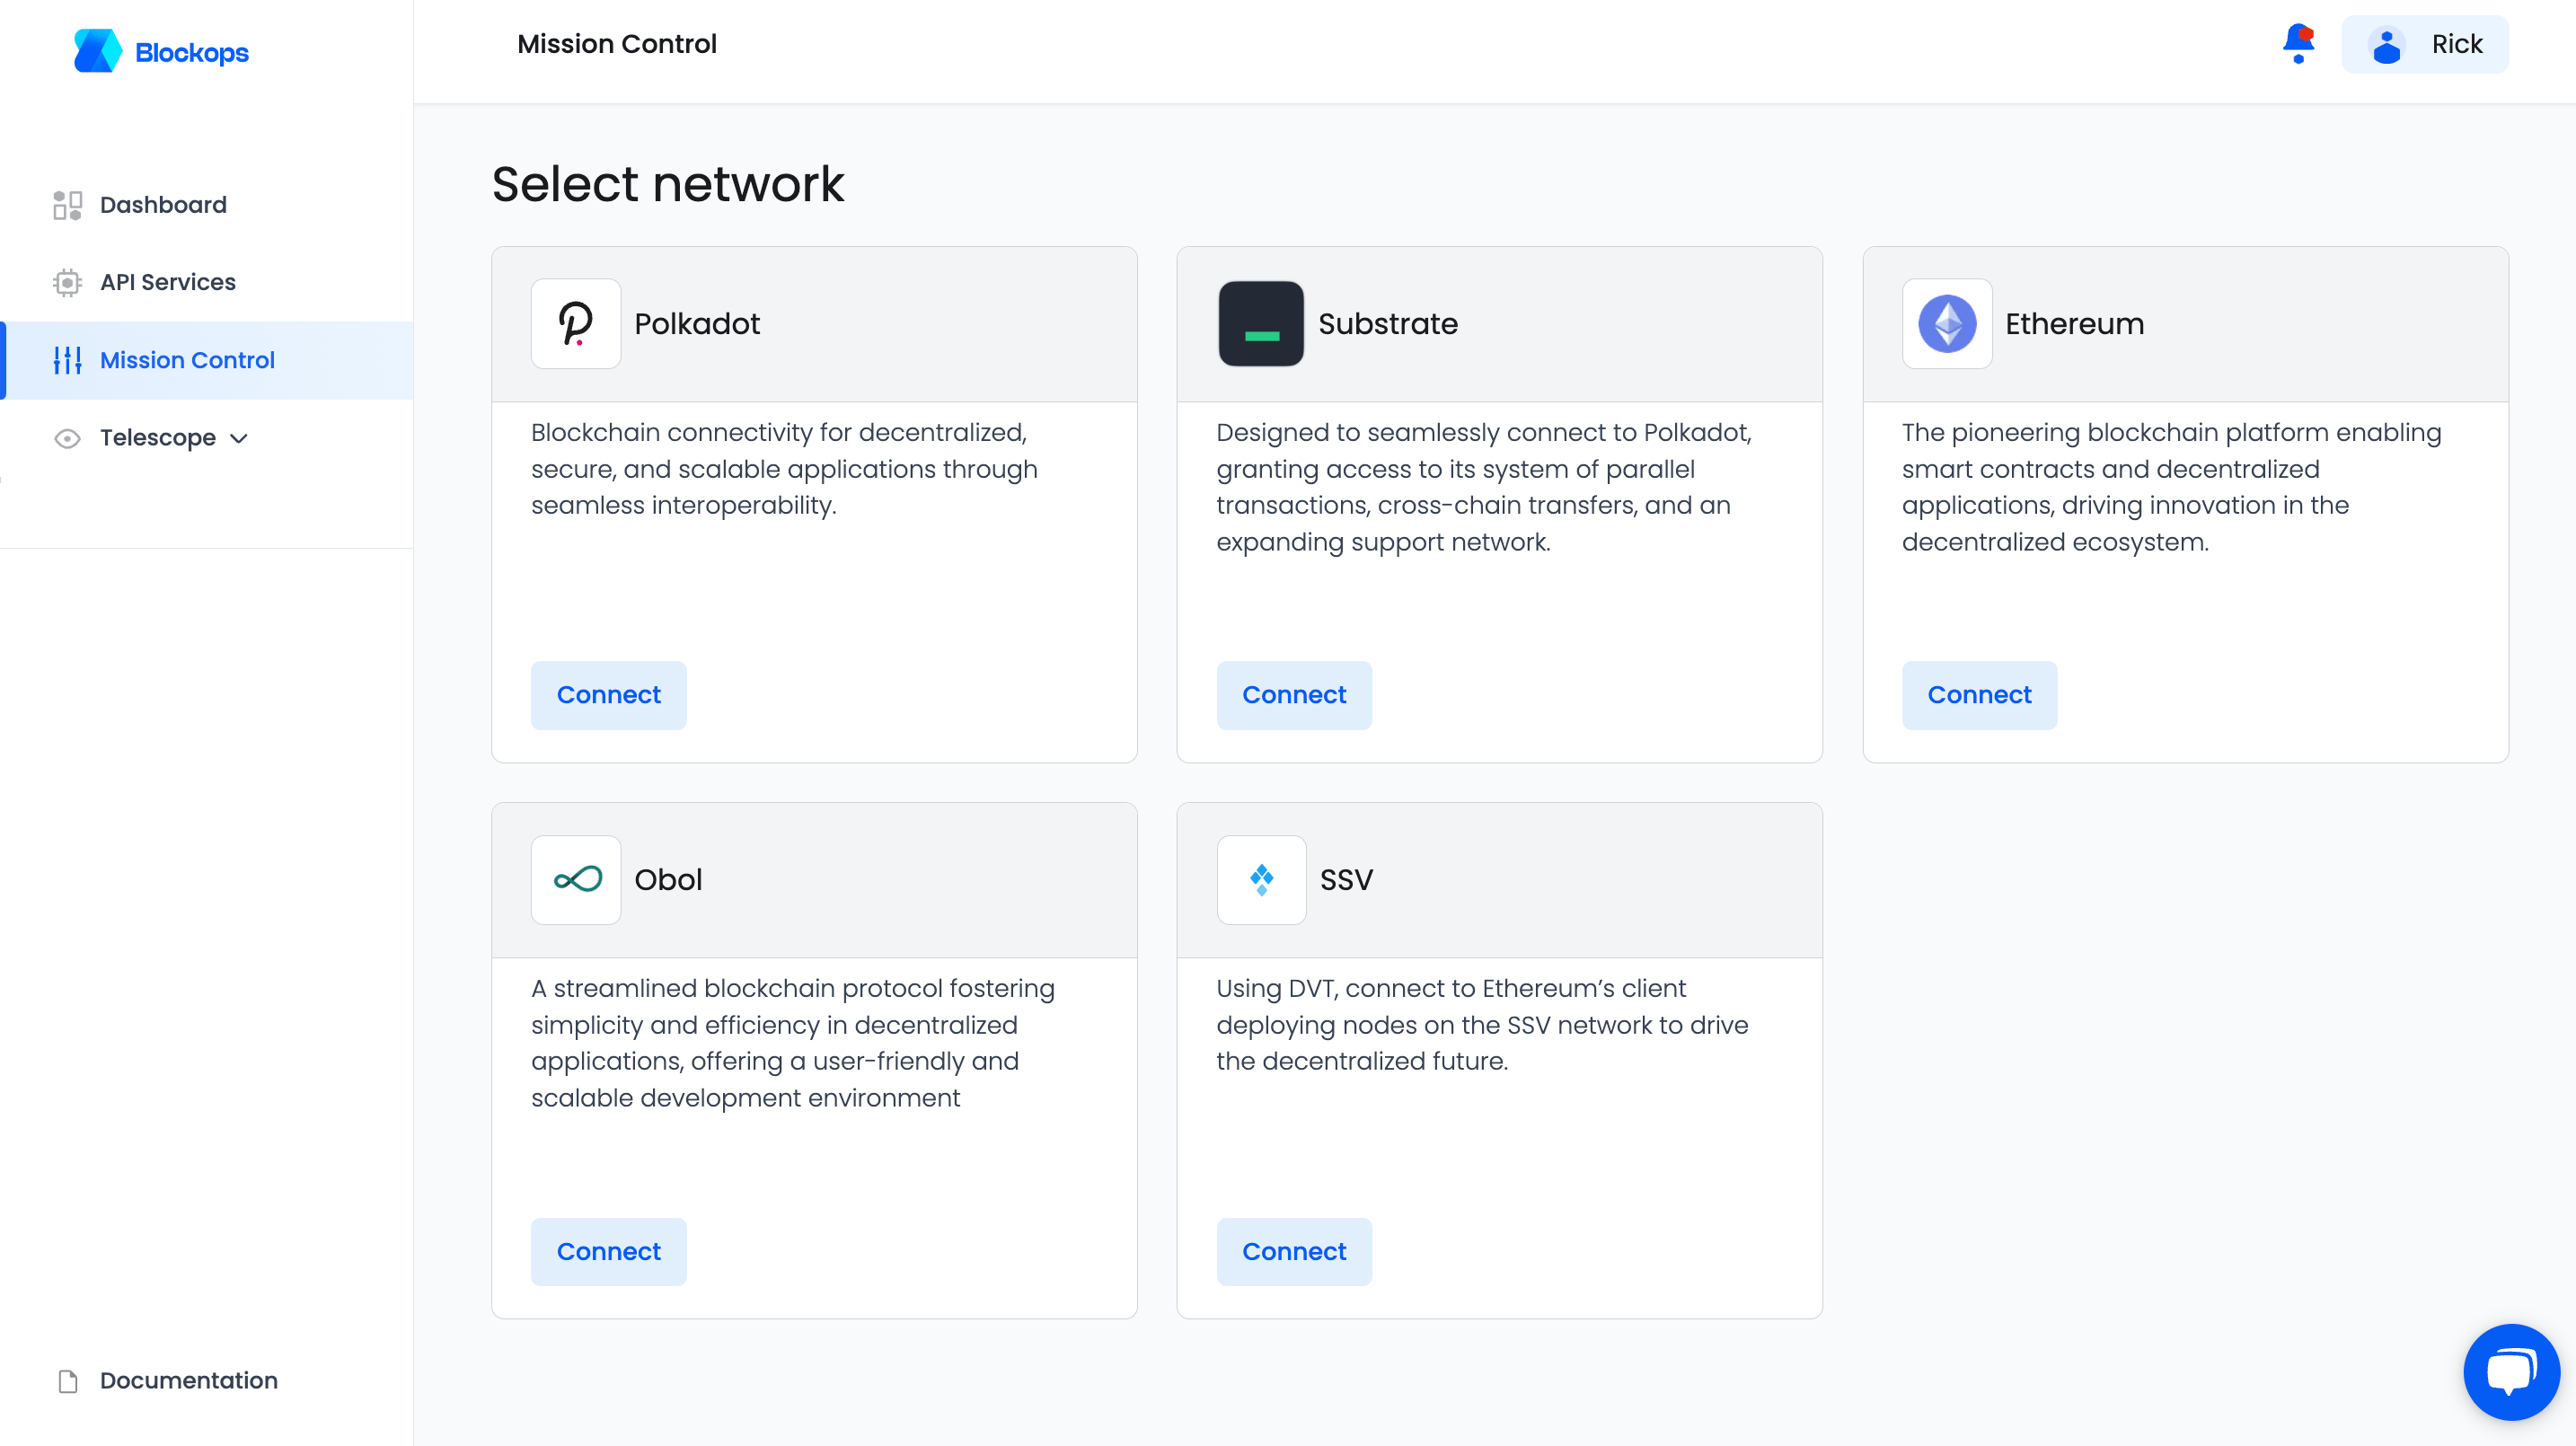
- Mainnet
- Holesky - One of two testnet environments for the testing and validation of new features and changes before deployment on the mainnet
- Sepolia - One of two testnet environments for the testing and validation of new features and changes before deployment on the mainnet
Platform Config
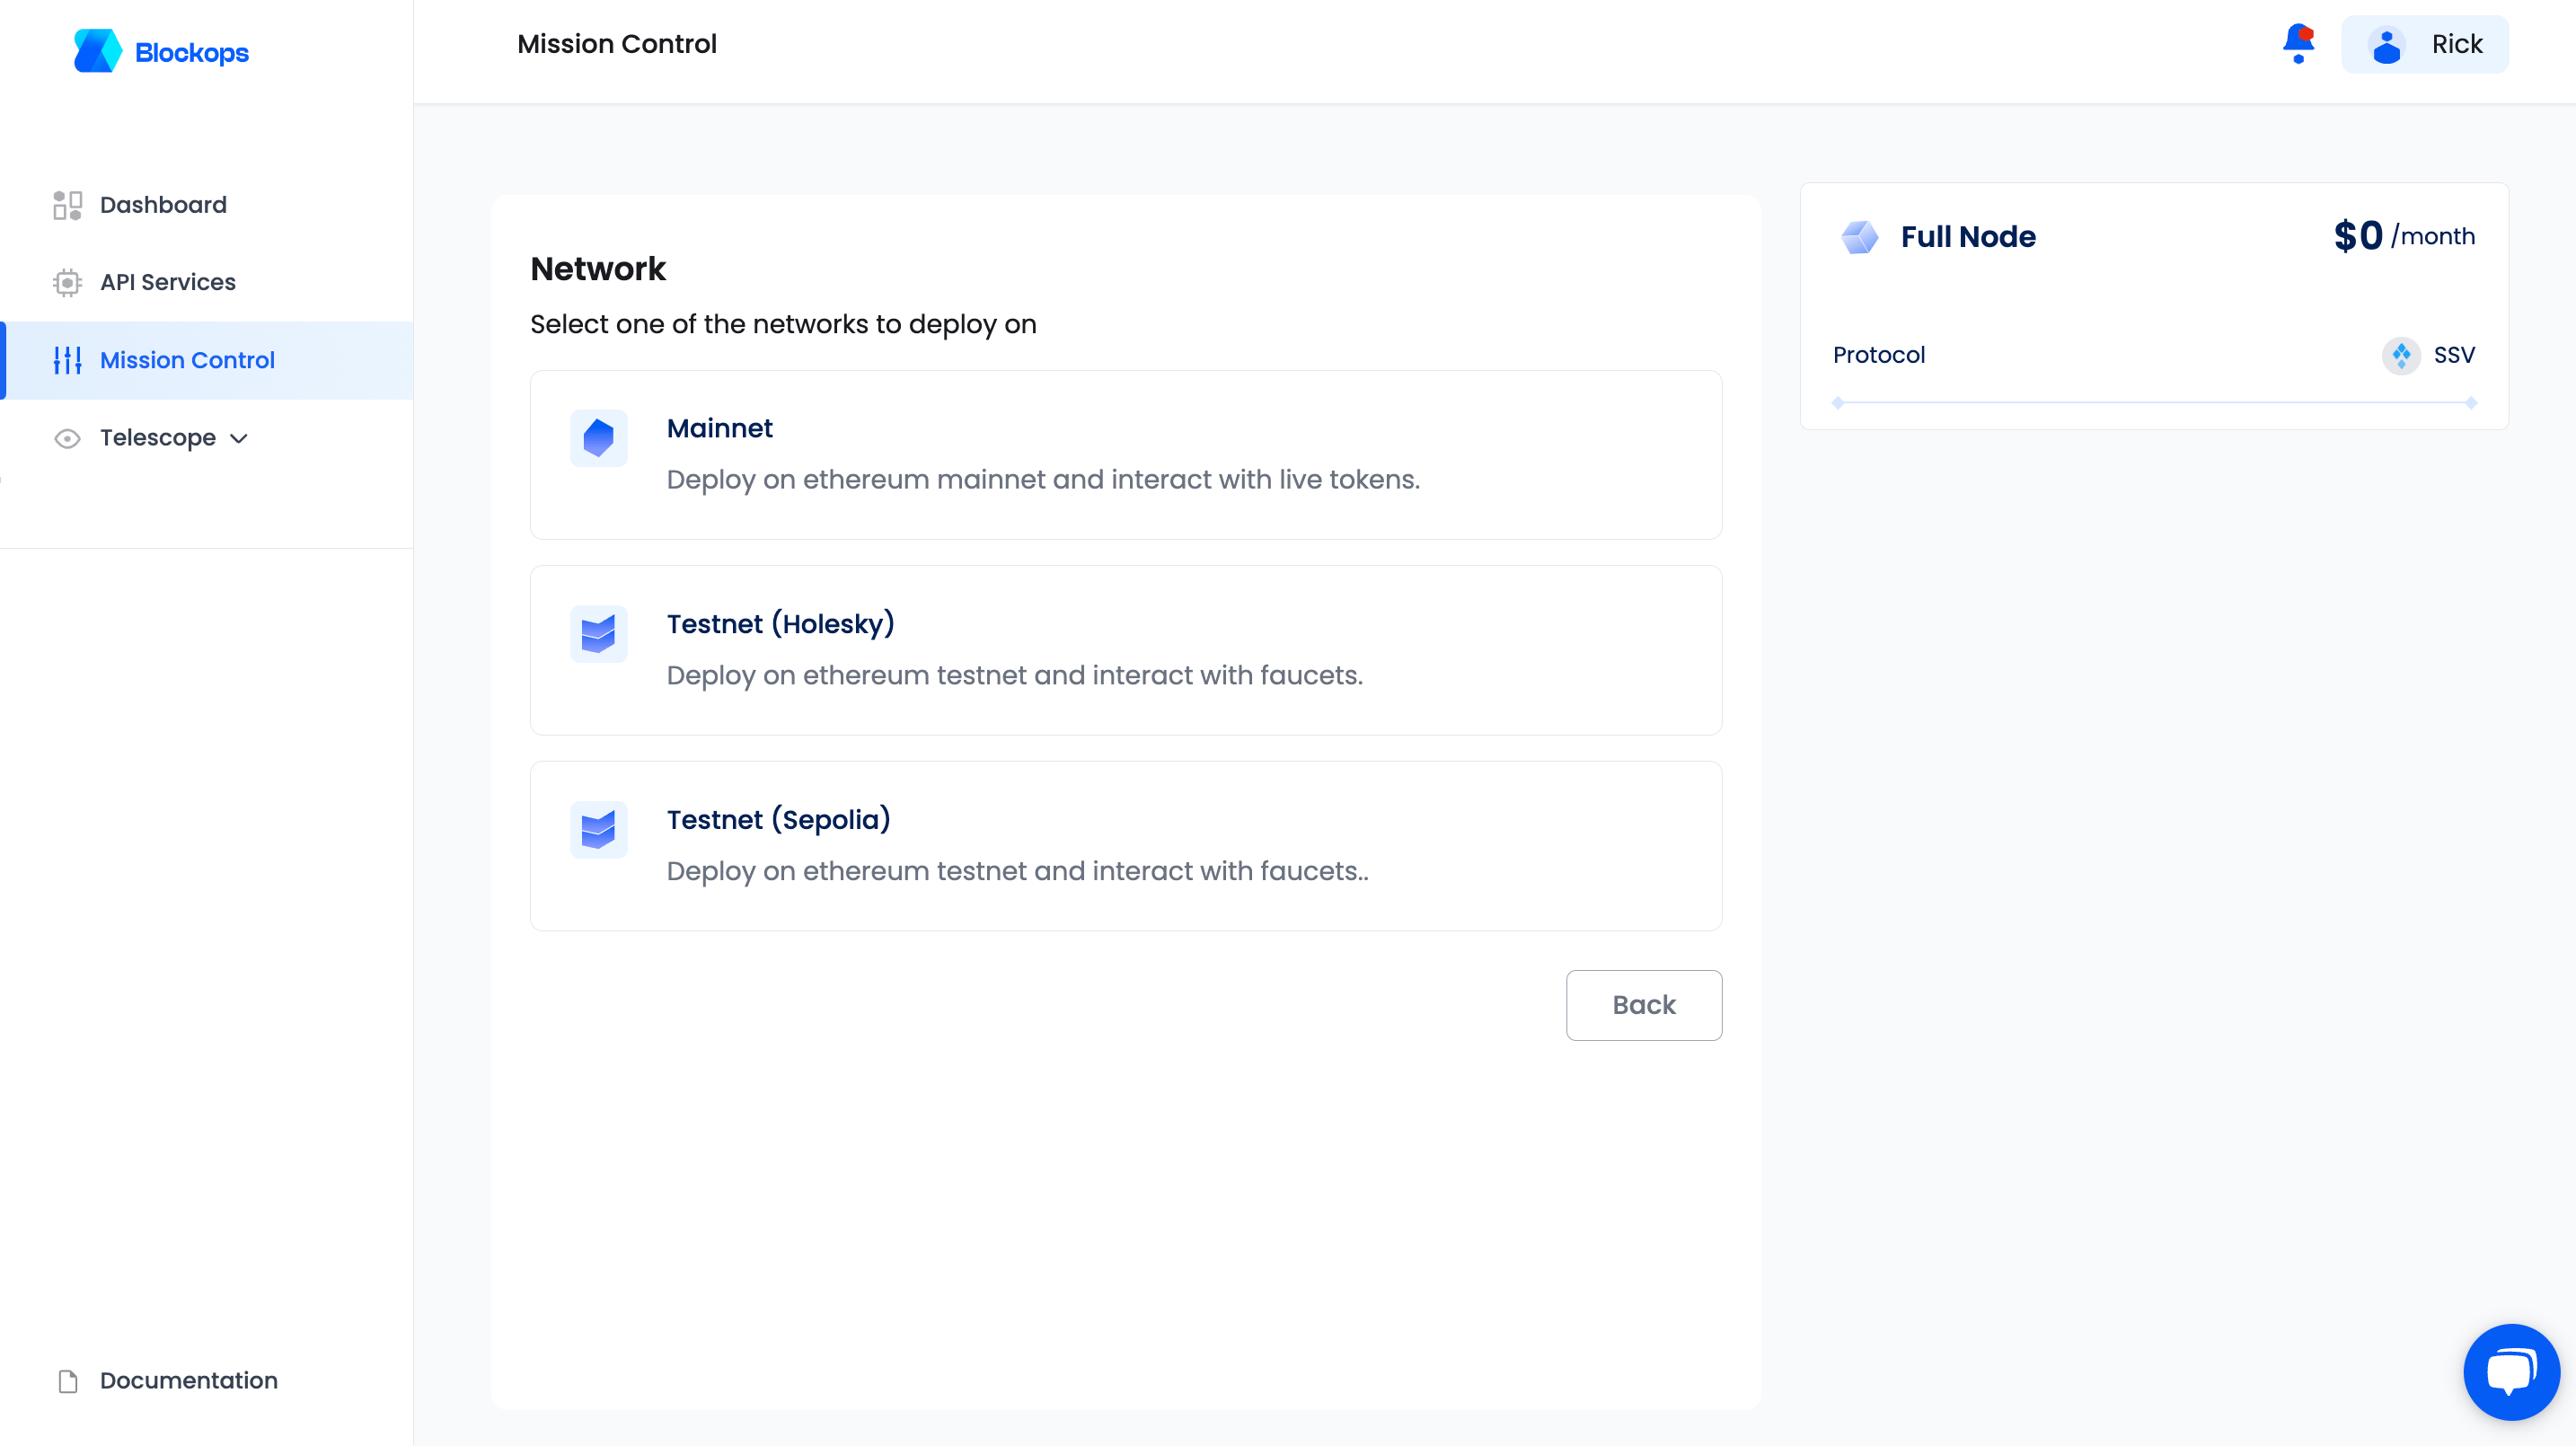
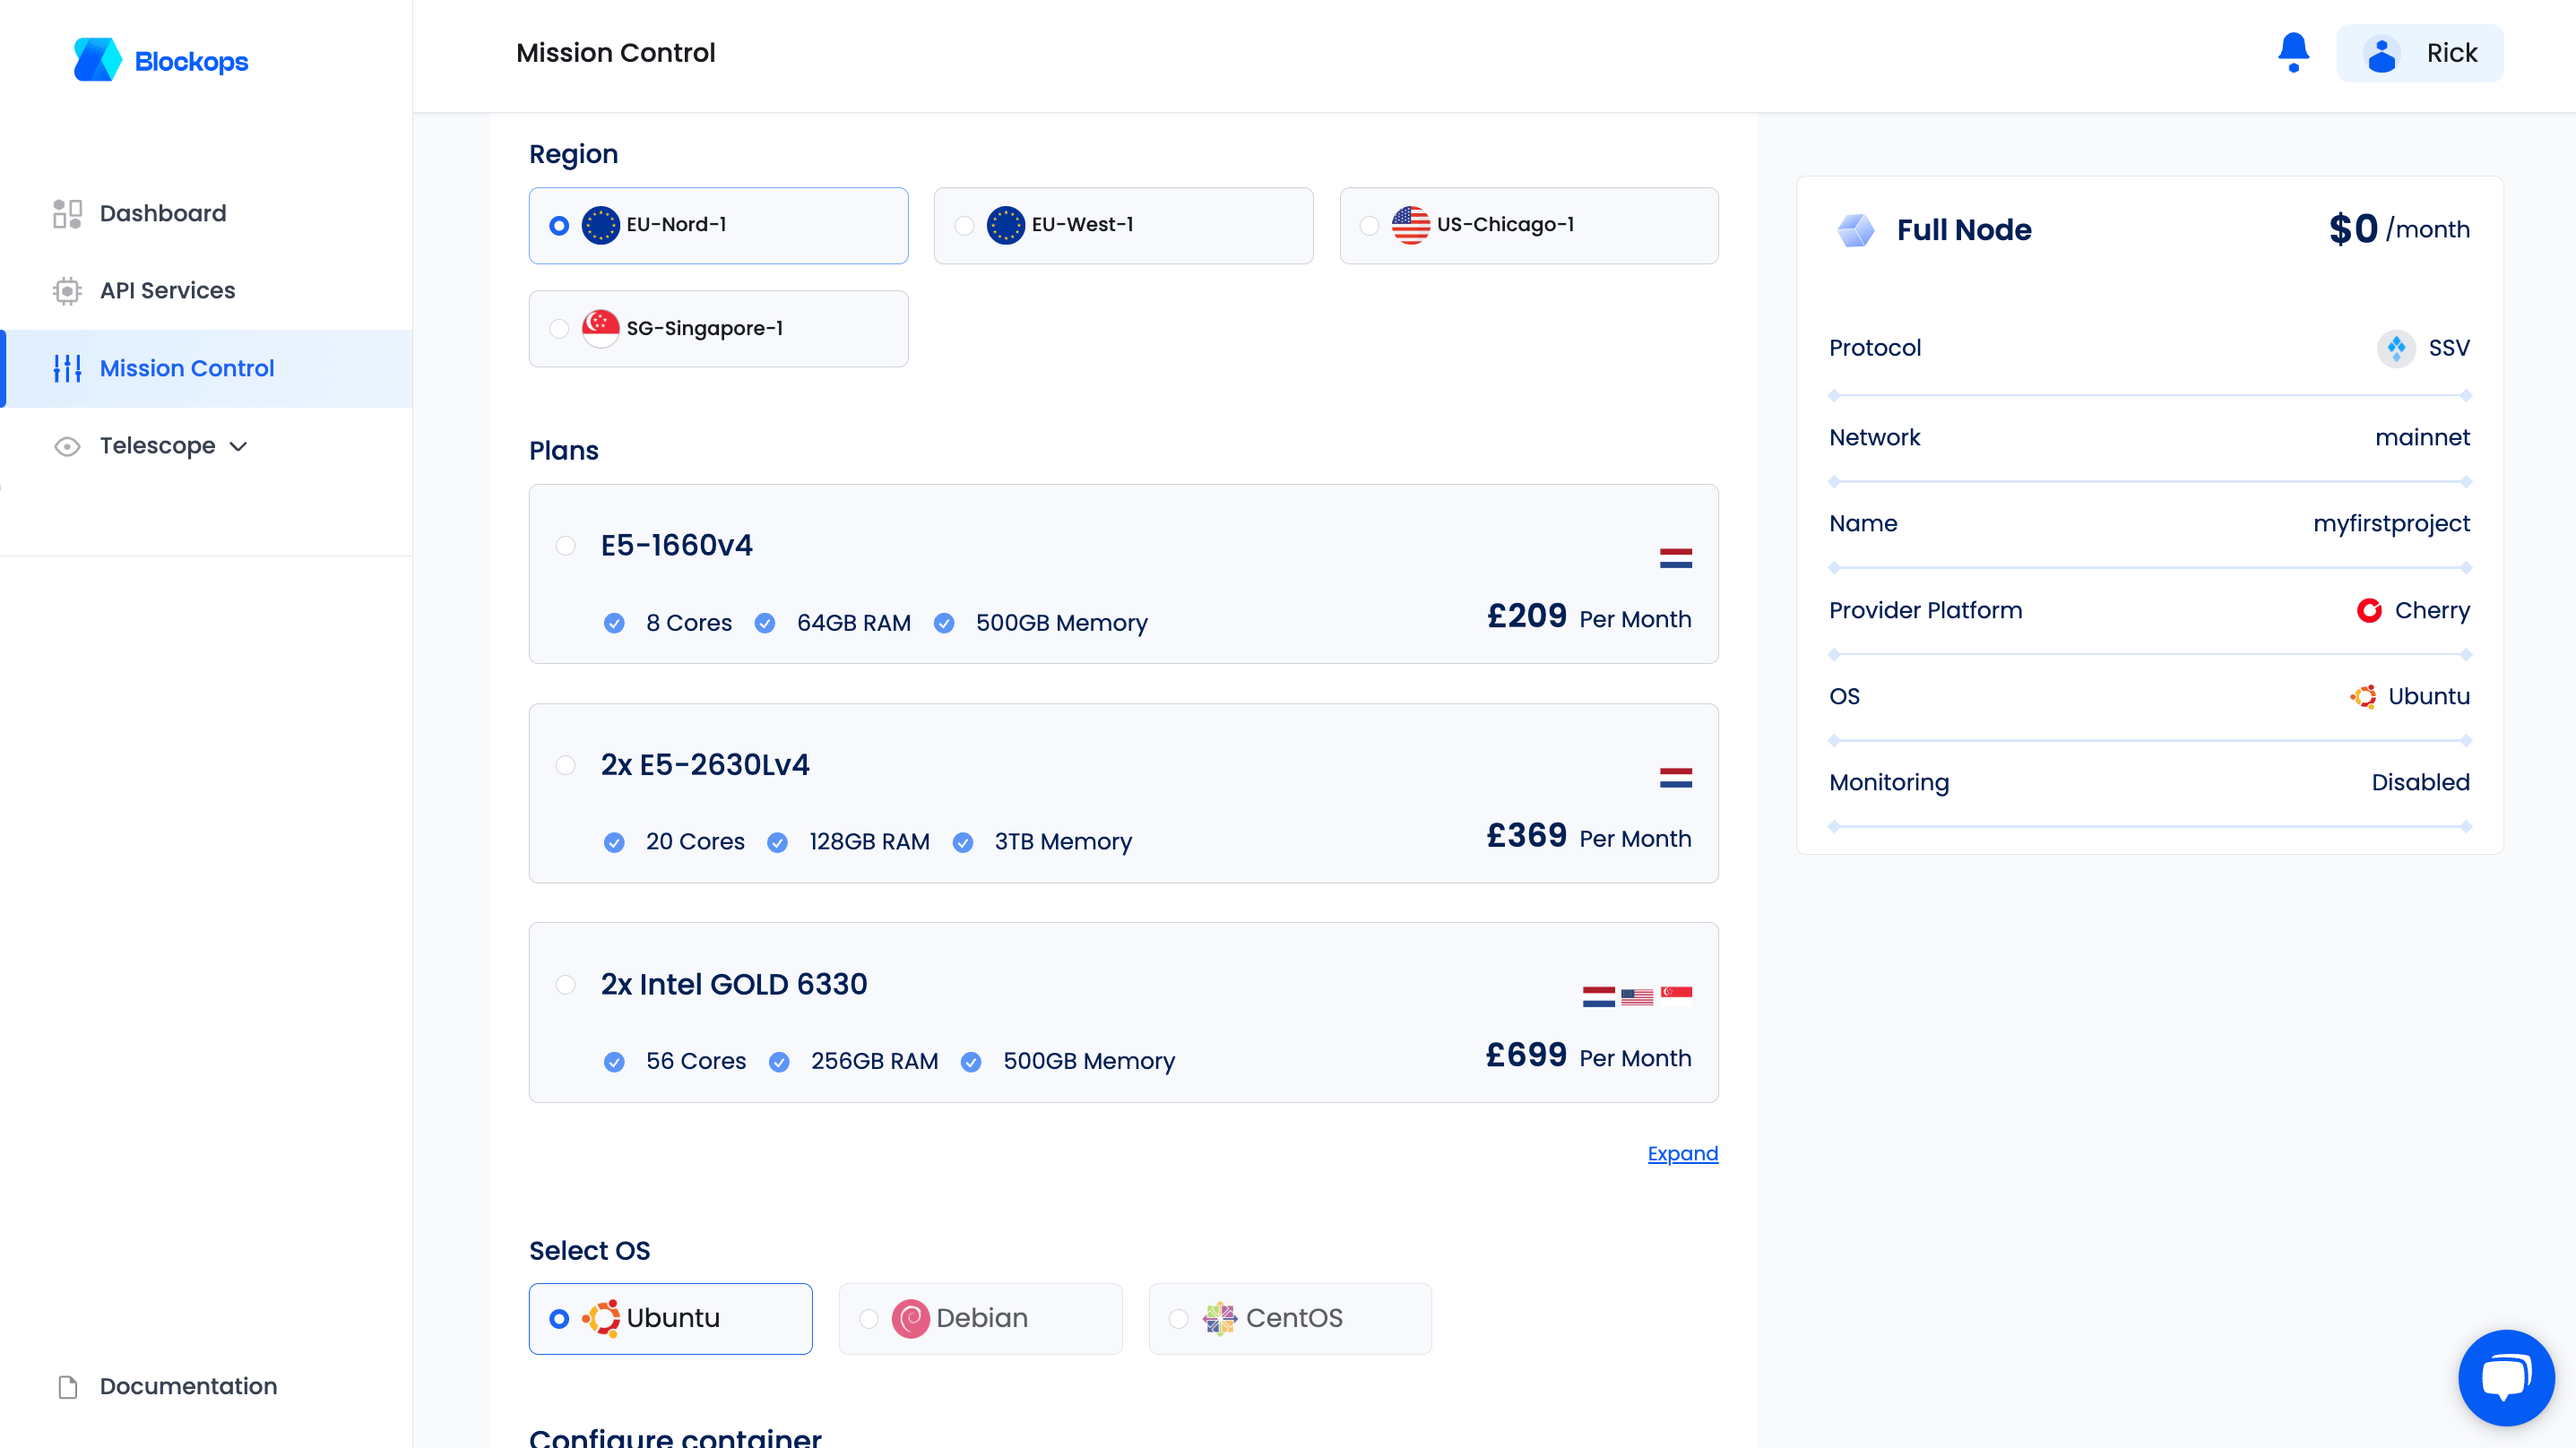
To create a node, the system suggests aProject Name which can be customised by editing the project name field. Blockops supports both self managed cloud providers and dedicated VPS platforms.
GCP
Deploying a node using the GCP platform, a service file is required to provide a secure means of authorisation in connecting to an existing GCP service account. The GCP project ID is extracted from the uploaded service file and displayed. To proceed, region selection is required.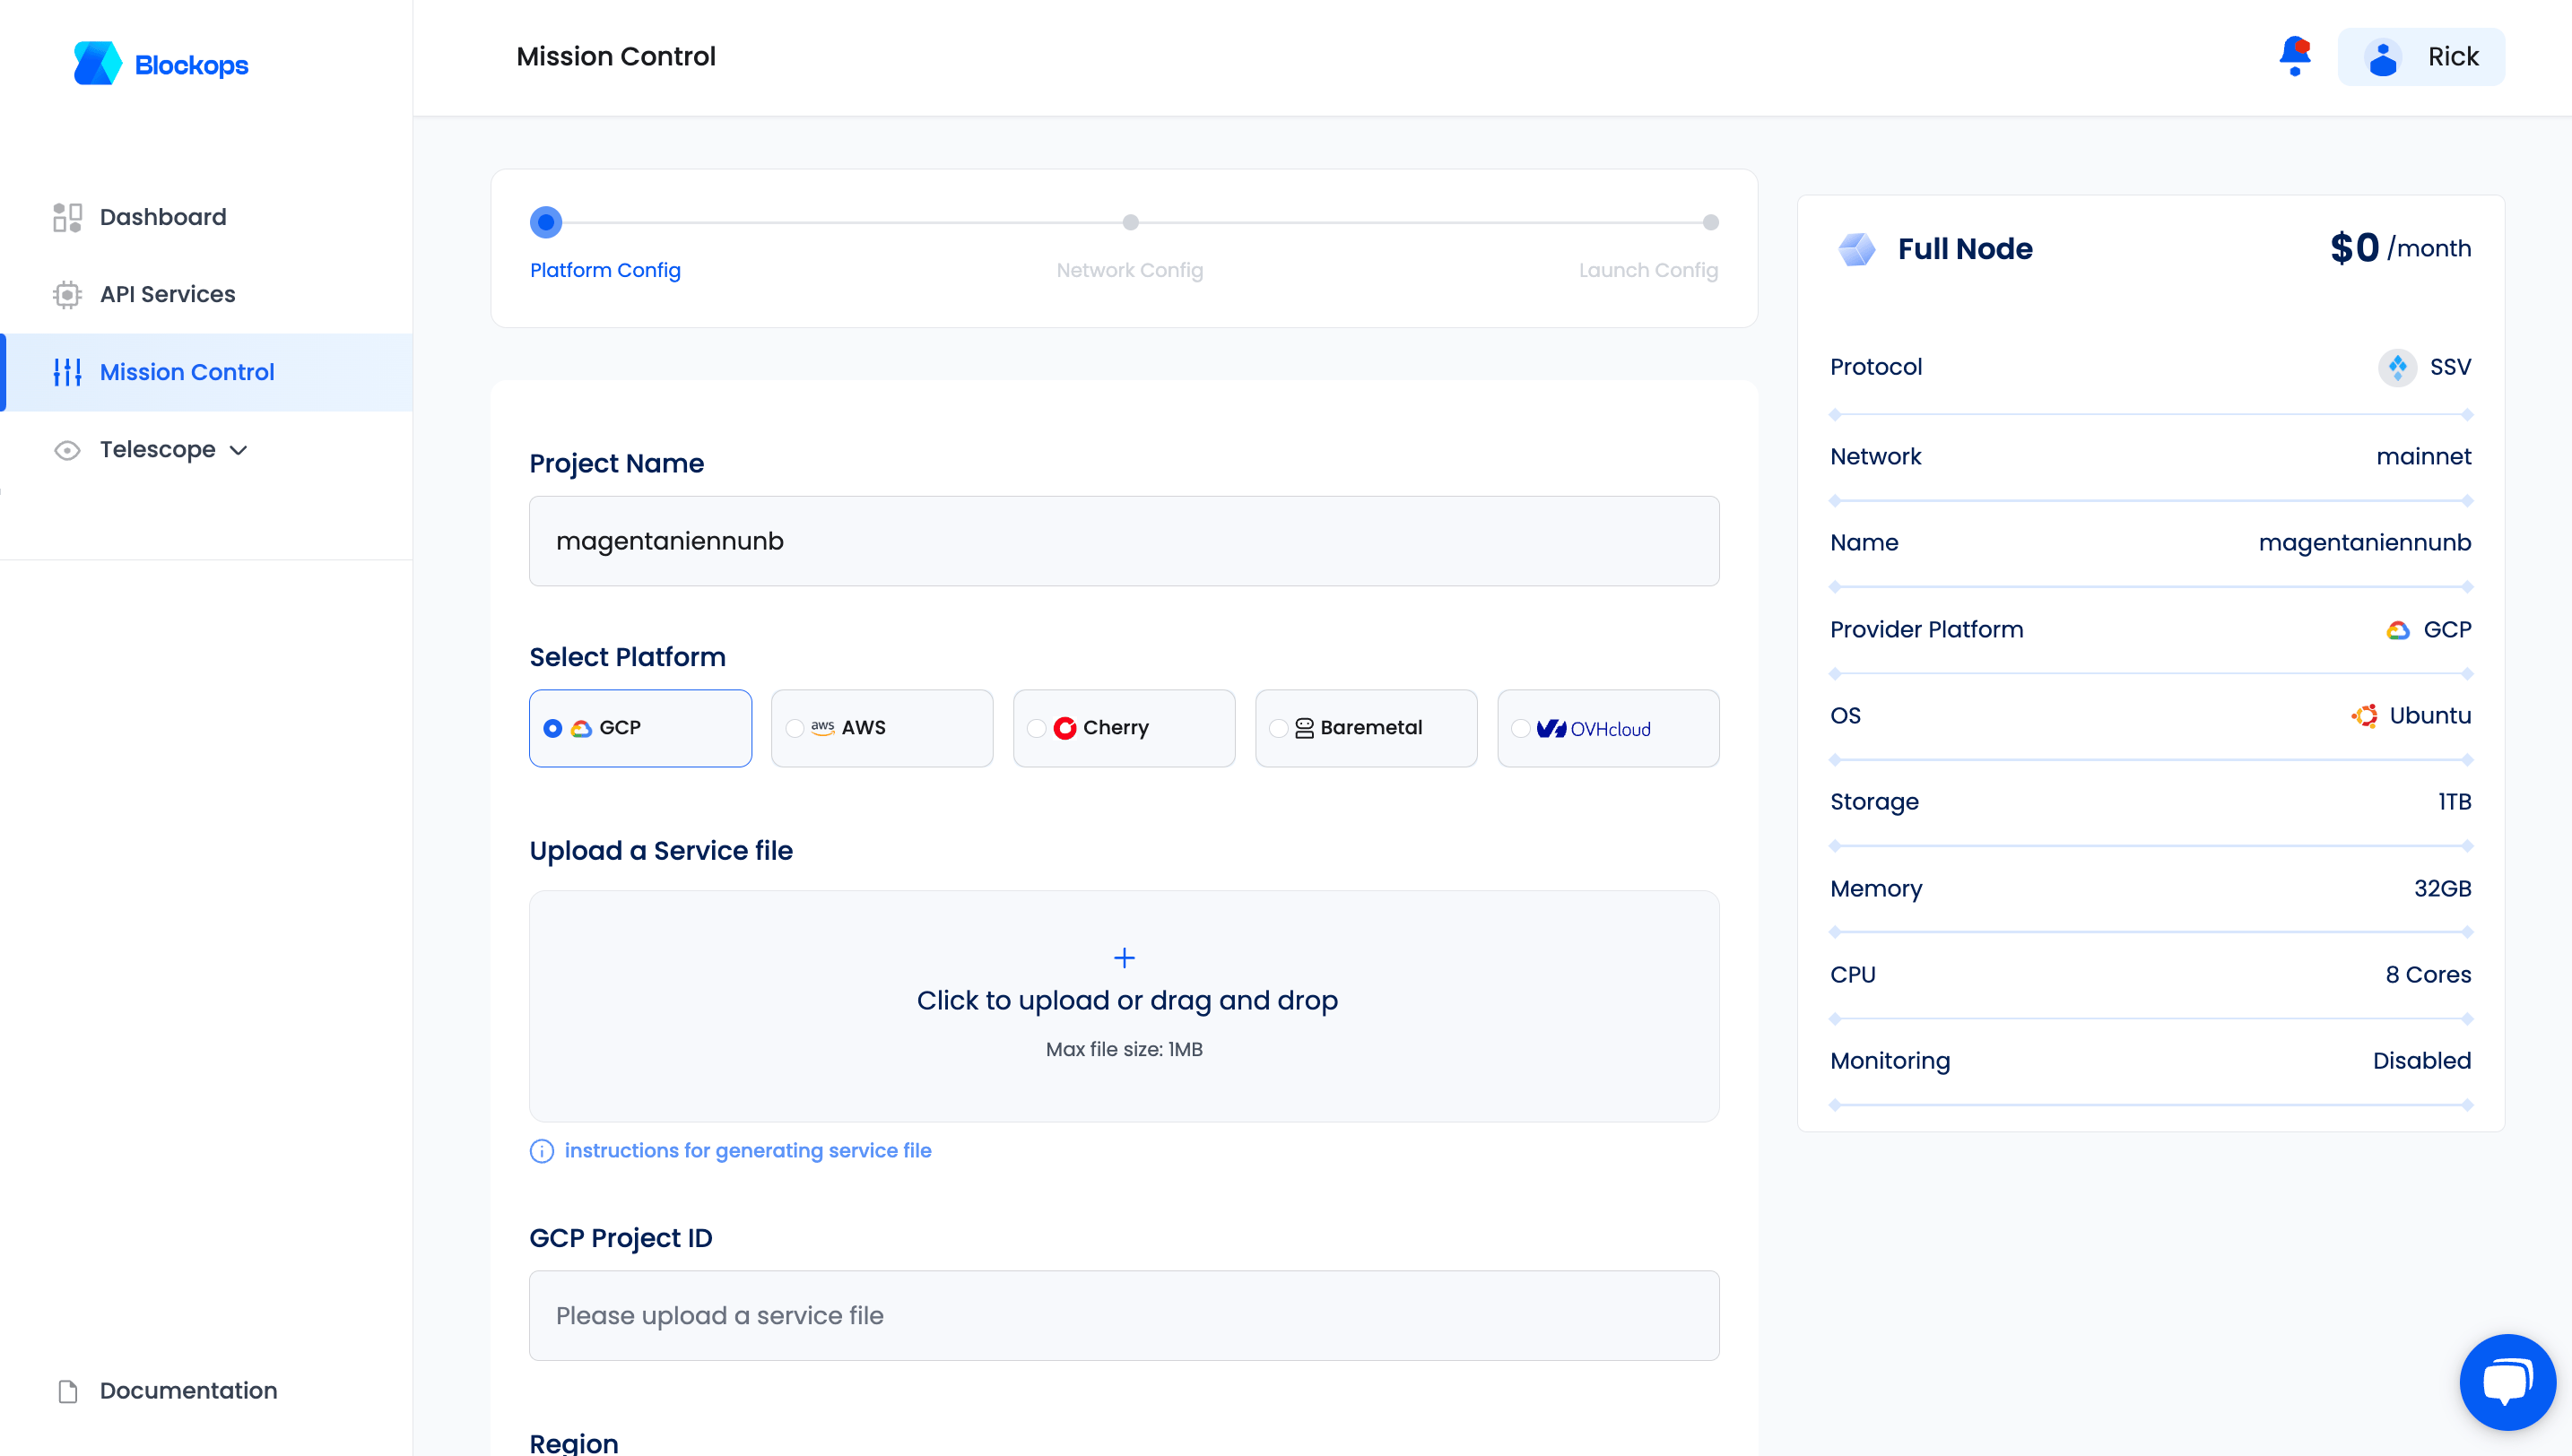
Instructions for generating service file
Instructions for generating service file- Setup required variable that will be used throughout the process
MY_GCP_PROJECT_ID=<GCP Project Id where you want to setup a node>
- Create service account
- Grant permissions to the service account
- Required roles
roles/compute.instanceAdmin.v1 roles/compute.loadBalancerAdmin roles/compute.networkAdmin roles/compute.securityAdmin roles/iam.serviceAccountAdmin roles/iam.serviceAccountUser roles/resourcemanager.projectIamAdmin
Snapshot Config
AWS
Deploying a node using the AWS platform, an account access key ID and an account secret key is required to provide a secure means of authorisation in connecting to an existing AWS account. To proceed, region selection is required.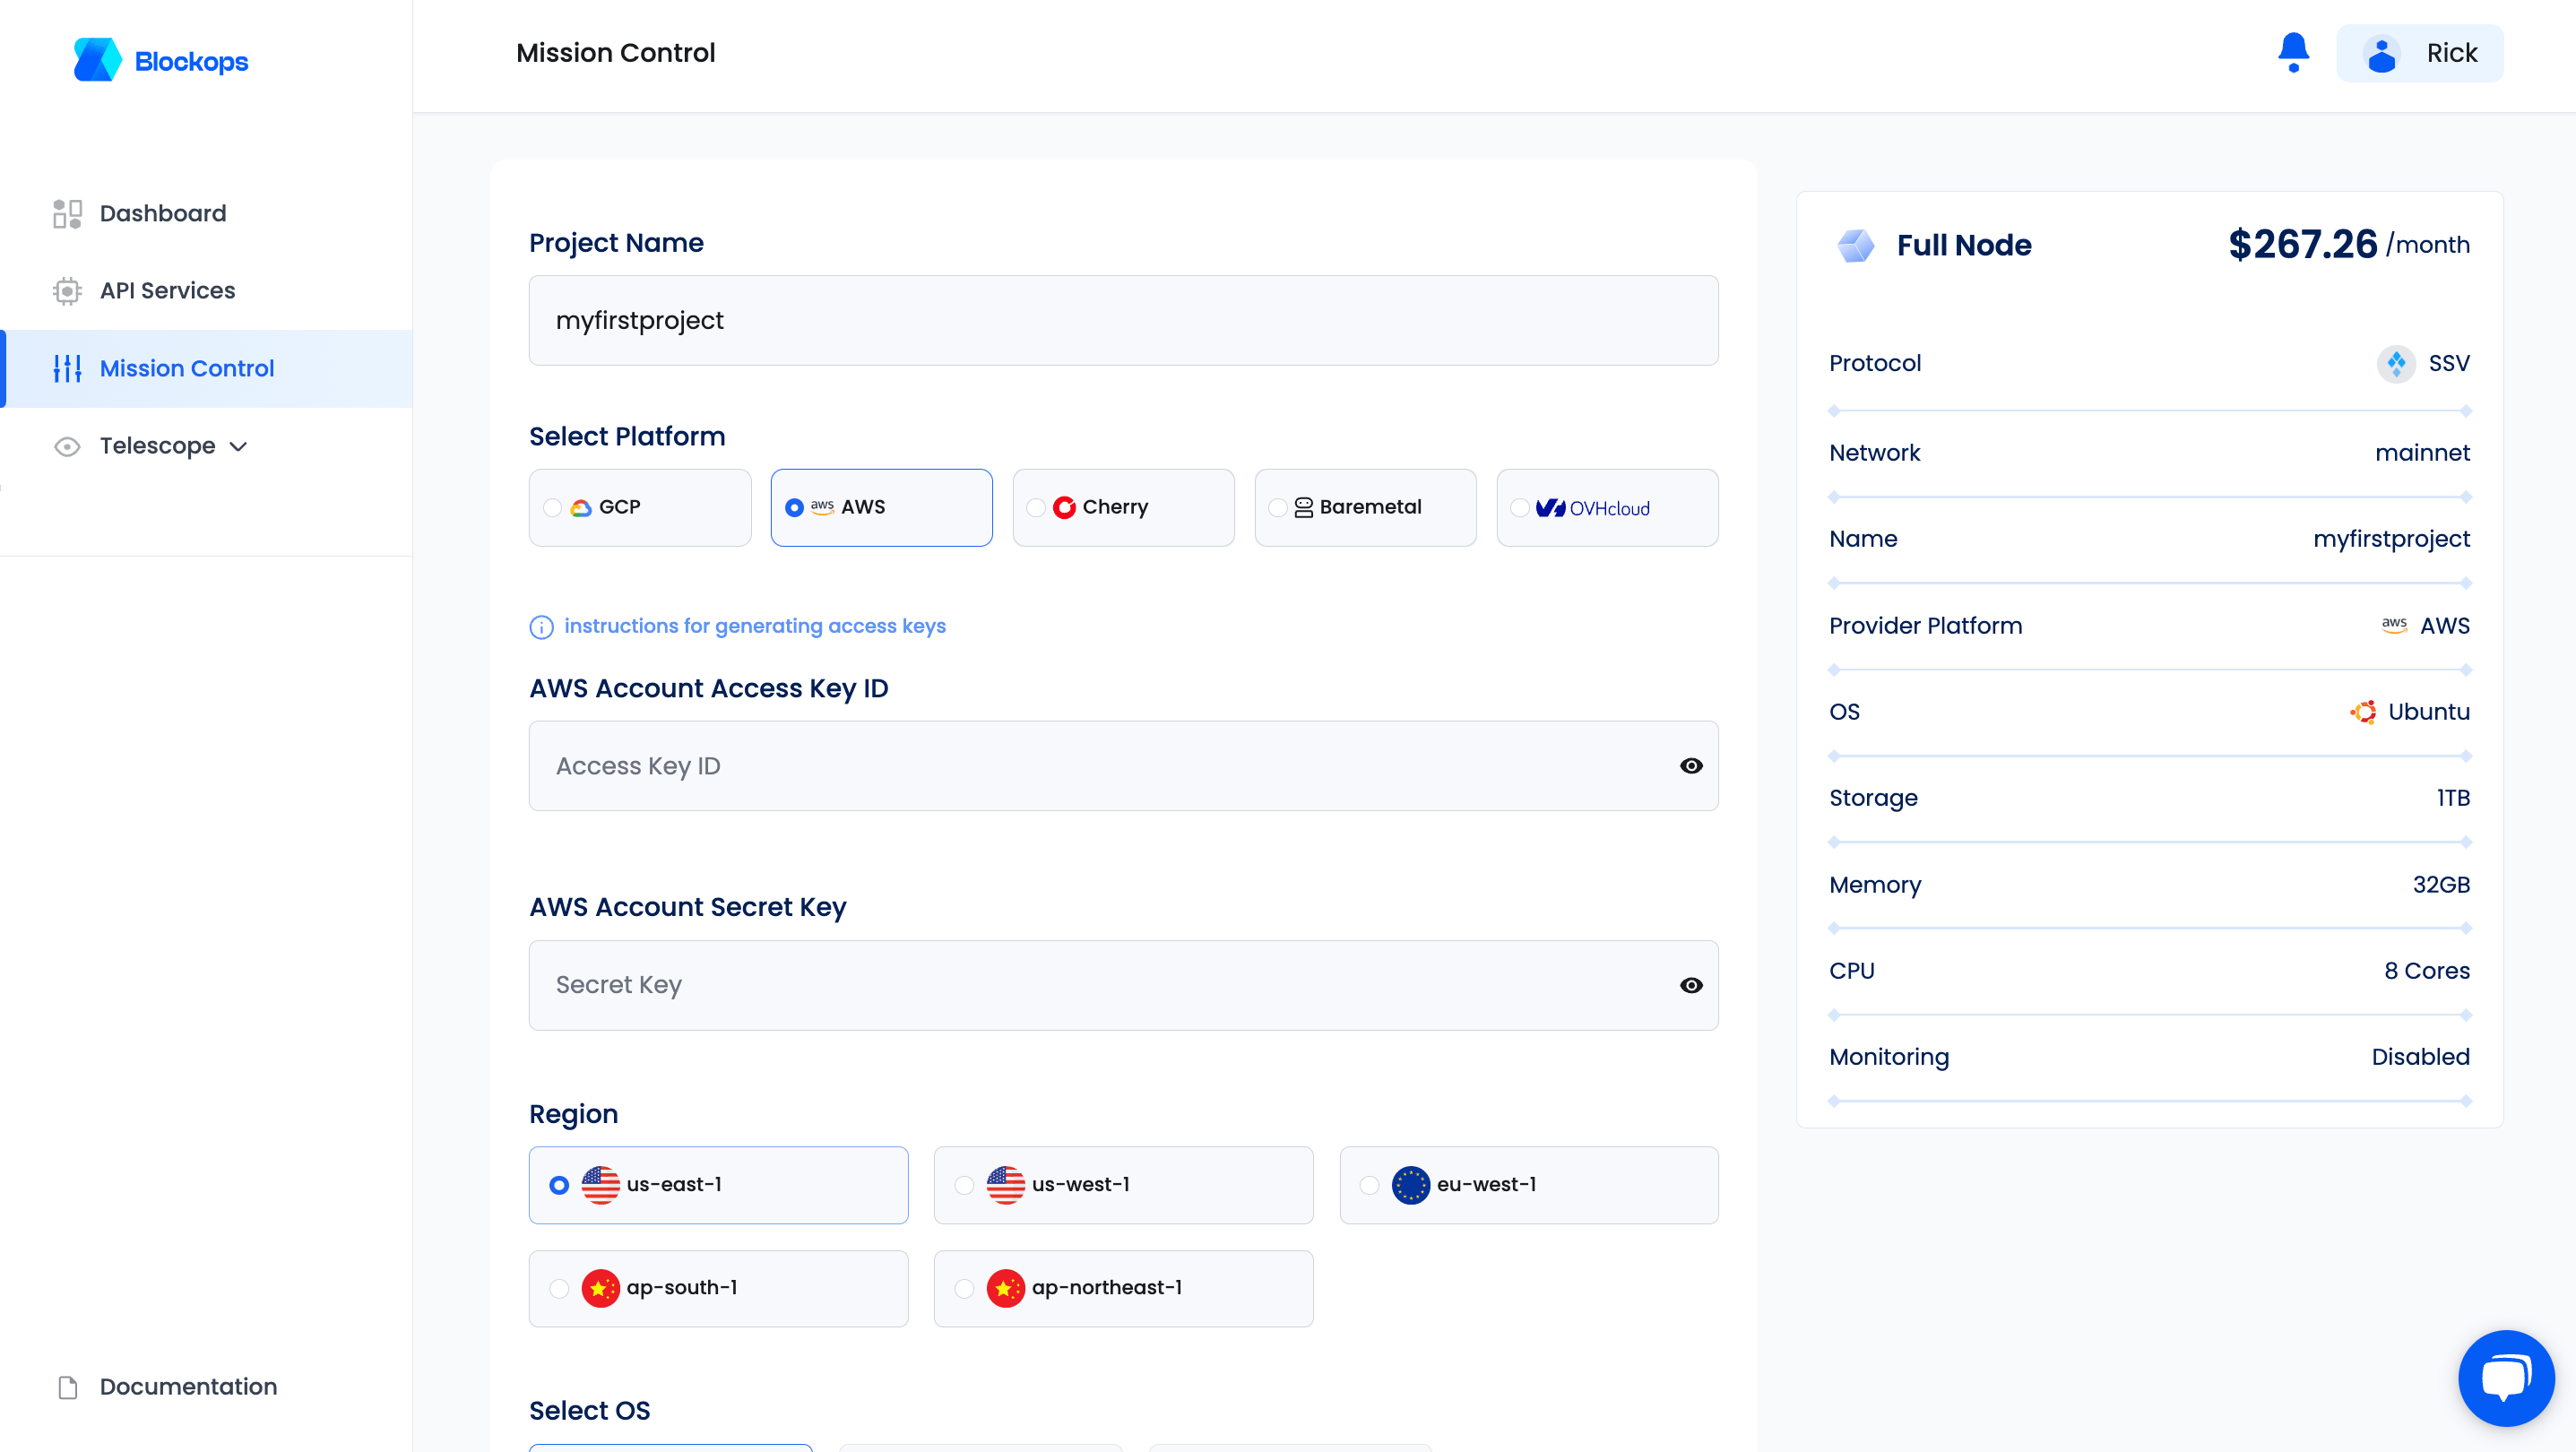
Instructions for generating access keys
- Install AWS CLI
- Run the following command to create a new IAM user:
aws iam create-user --user-name your_new_user
- Attach the AdminstratorAccess policy to this user
aws iam attach-user-policy --user-name your_new_user --policy-arn arn:aws:iam::aws:policy/AdministratorAccess
- Create an access key for your newly created IAM user:
aws iam create-access-key --user-name your_new_user
- Save the Access Key ID and Secret Access Key
Configure self managed platforms, AWS and GCP
Two configuration options exists to set your needed resources; 1: Default - the default configuration is a recommended setting taking into account the minimum needed resources to spin up a node. 2: Custom - This configuration enables you to customise your resources.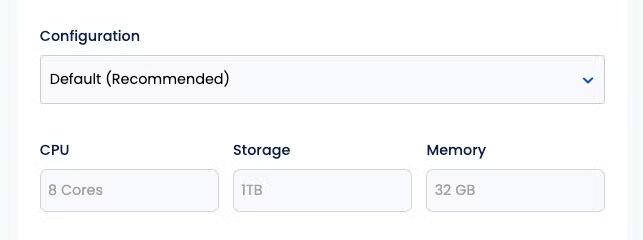
Cherry Servers
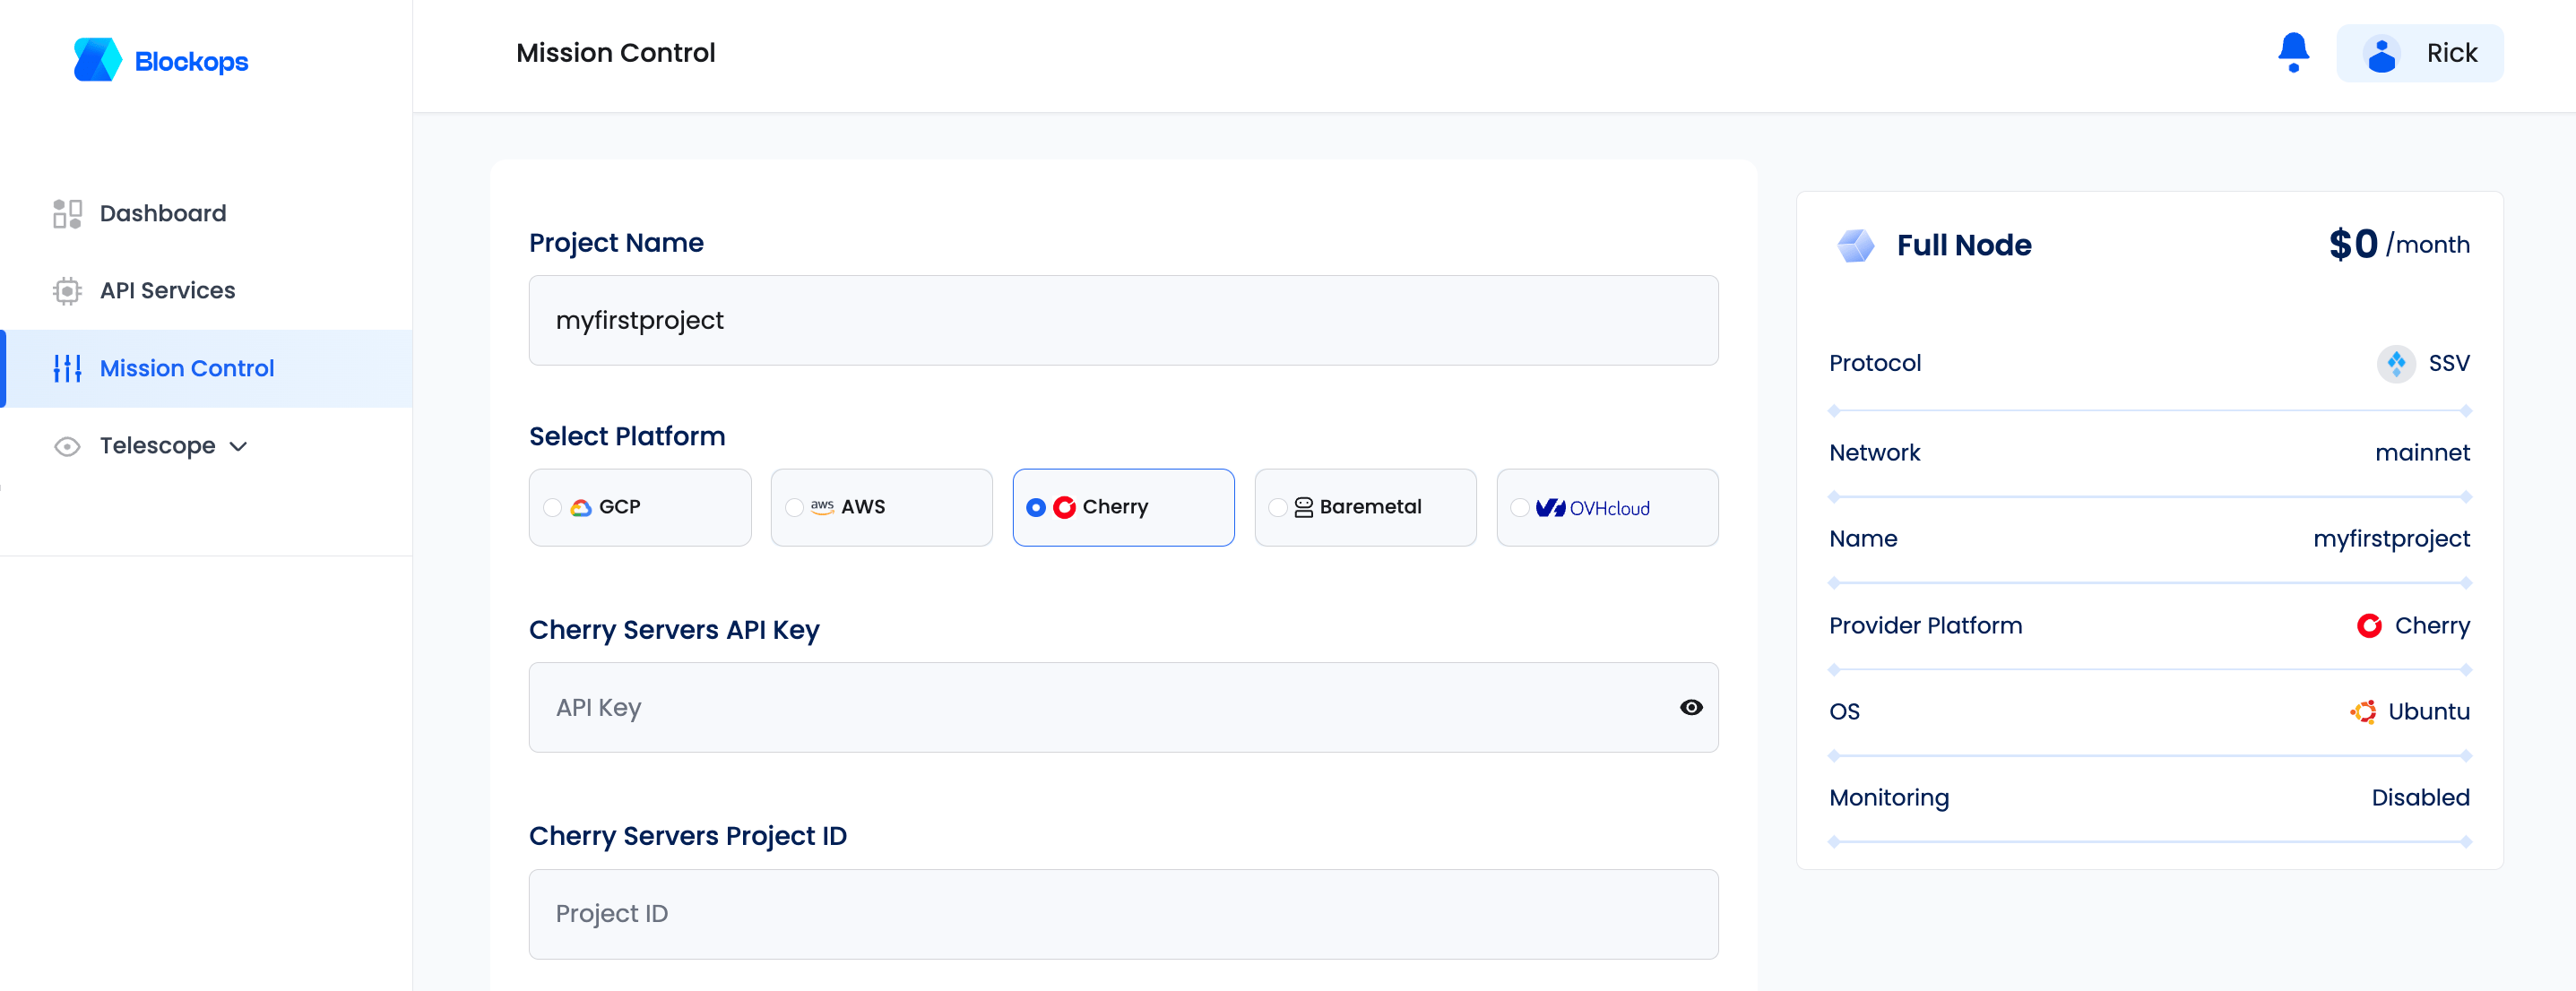
To connect to Cherry Servers, an API key and project ID is required Instructions for generating a Cherry Servers API key- Log in to the Cherry Servers client portal athttps://portal.cherryservers.com/
- Navigate to the API section under user profile.
- Select API key and customise a label
- Generate a new API token.
- Log in to the Cherry Servers client portal at https://portal.cherryservers.com/.
- Navigate to the “Projects” section on the dashboard.
- Click on the “Create Project” button.
- Provide a name for your new project and any other required details.
- After creating the project, you’ll be able to see its Project ID.
- Go to the “Projects” section in the dashboard.
- Select the project you want to use.
- The Project ID will be displayed in the project details.
SSH Key
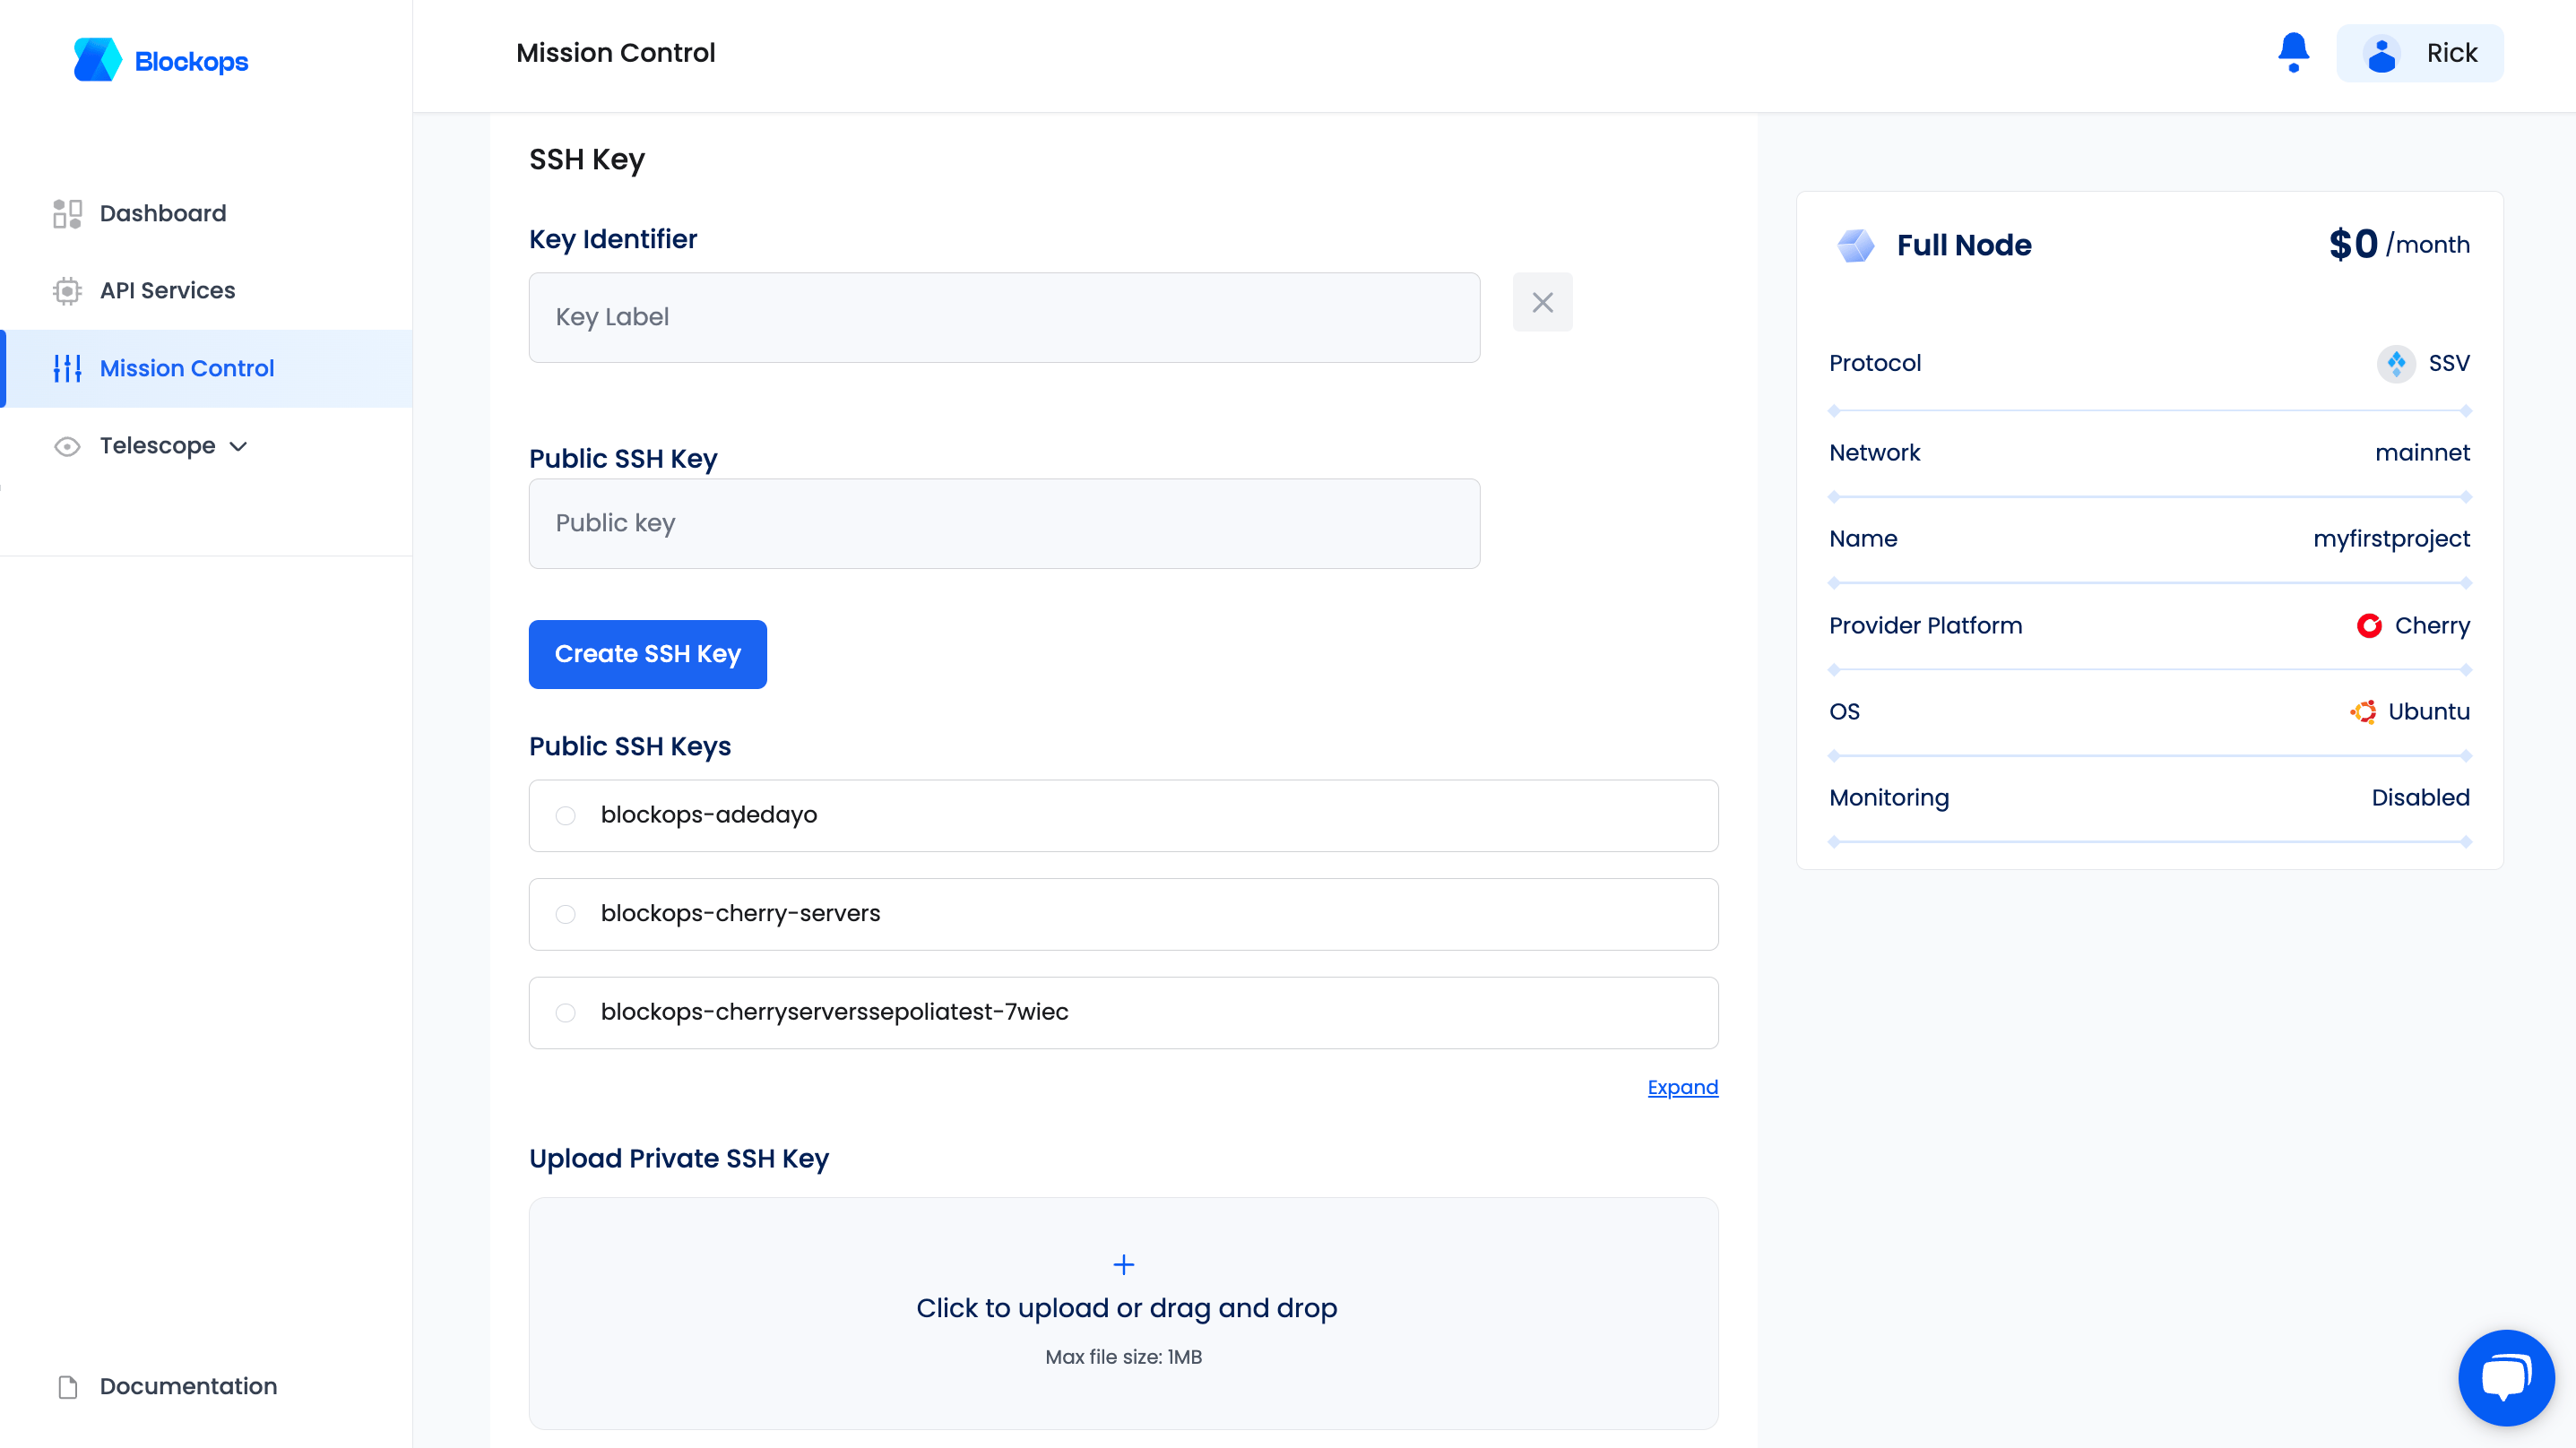
Toadd a new SSH public key, provide a key identifier and generate a public SSH key.
Instructions on generating an SSH key pair
Run this command on your own machine:
~/.ssh/id_rsa) and press Enter again to create a key without a passphrase. Blockops does not support passphrased private keys.
After generating your key pair, copy the contents of ~/.ssh/id_rsa.pub (the public key) and paste it into the required field to create an SSH key on Blockops.
From the dropdown menu, select your newly created public SSH key and upload your private SSH key to proceed.
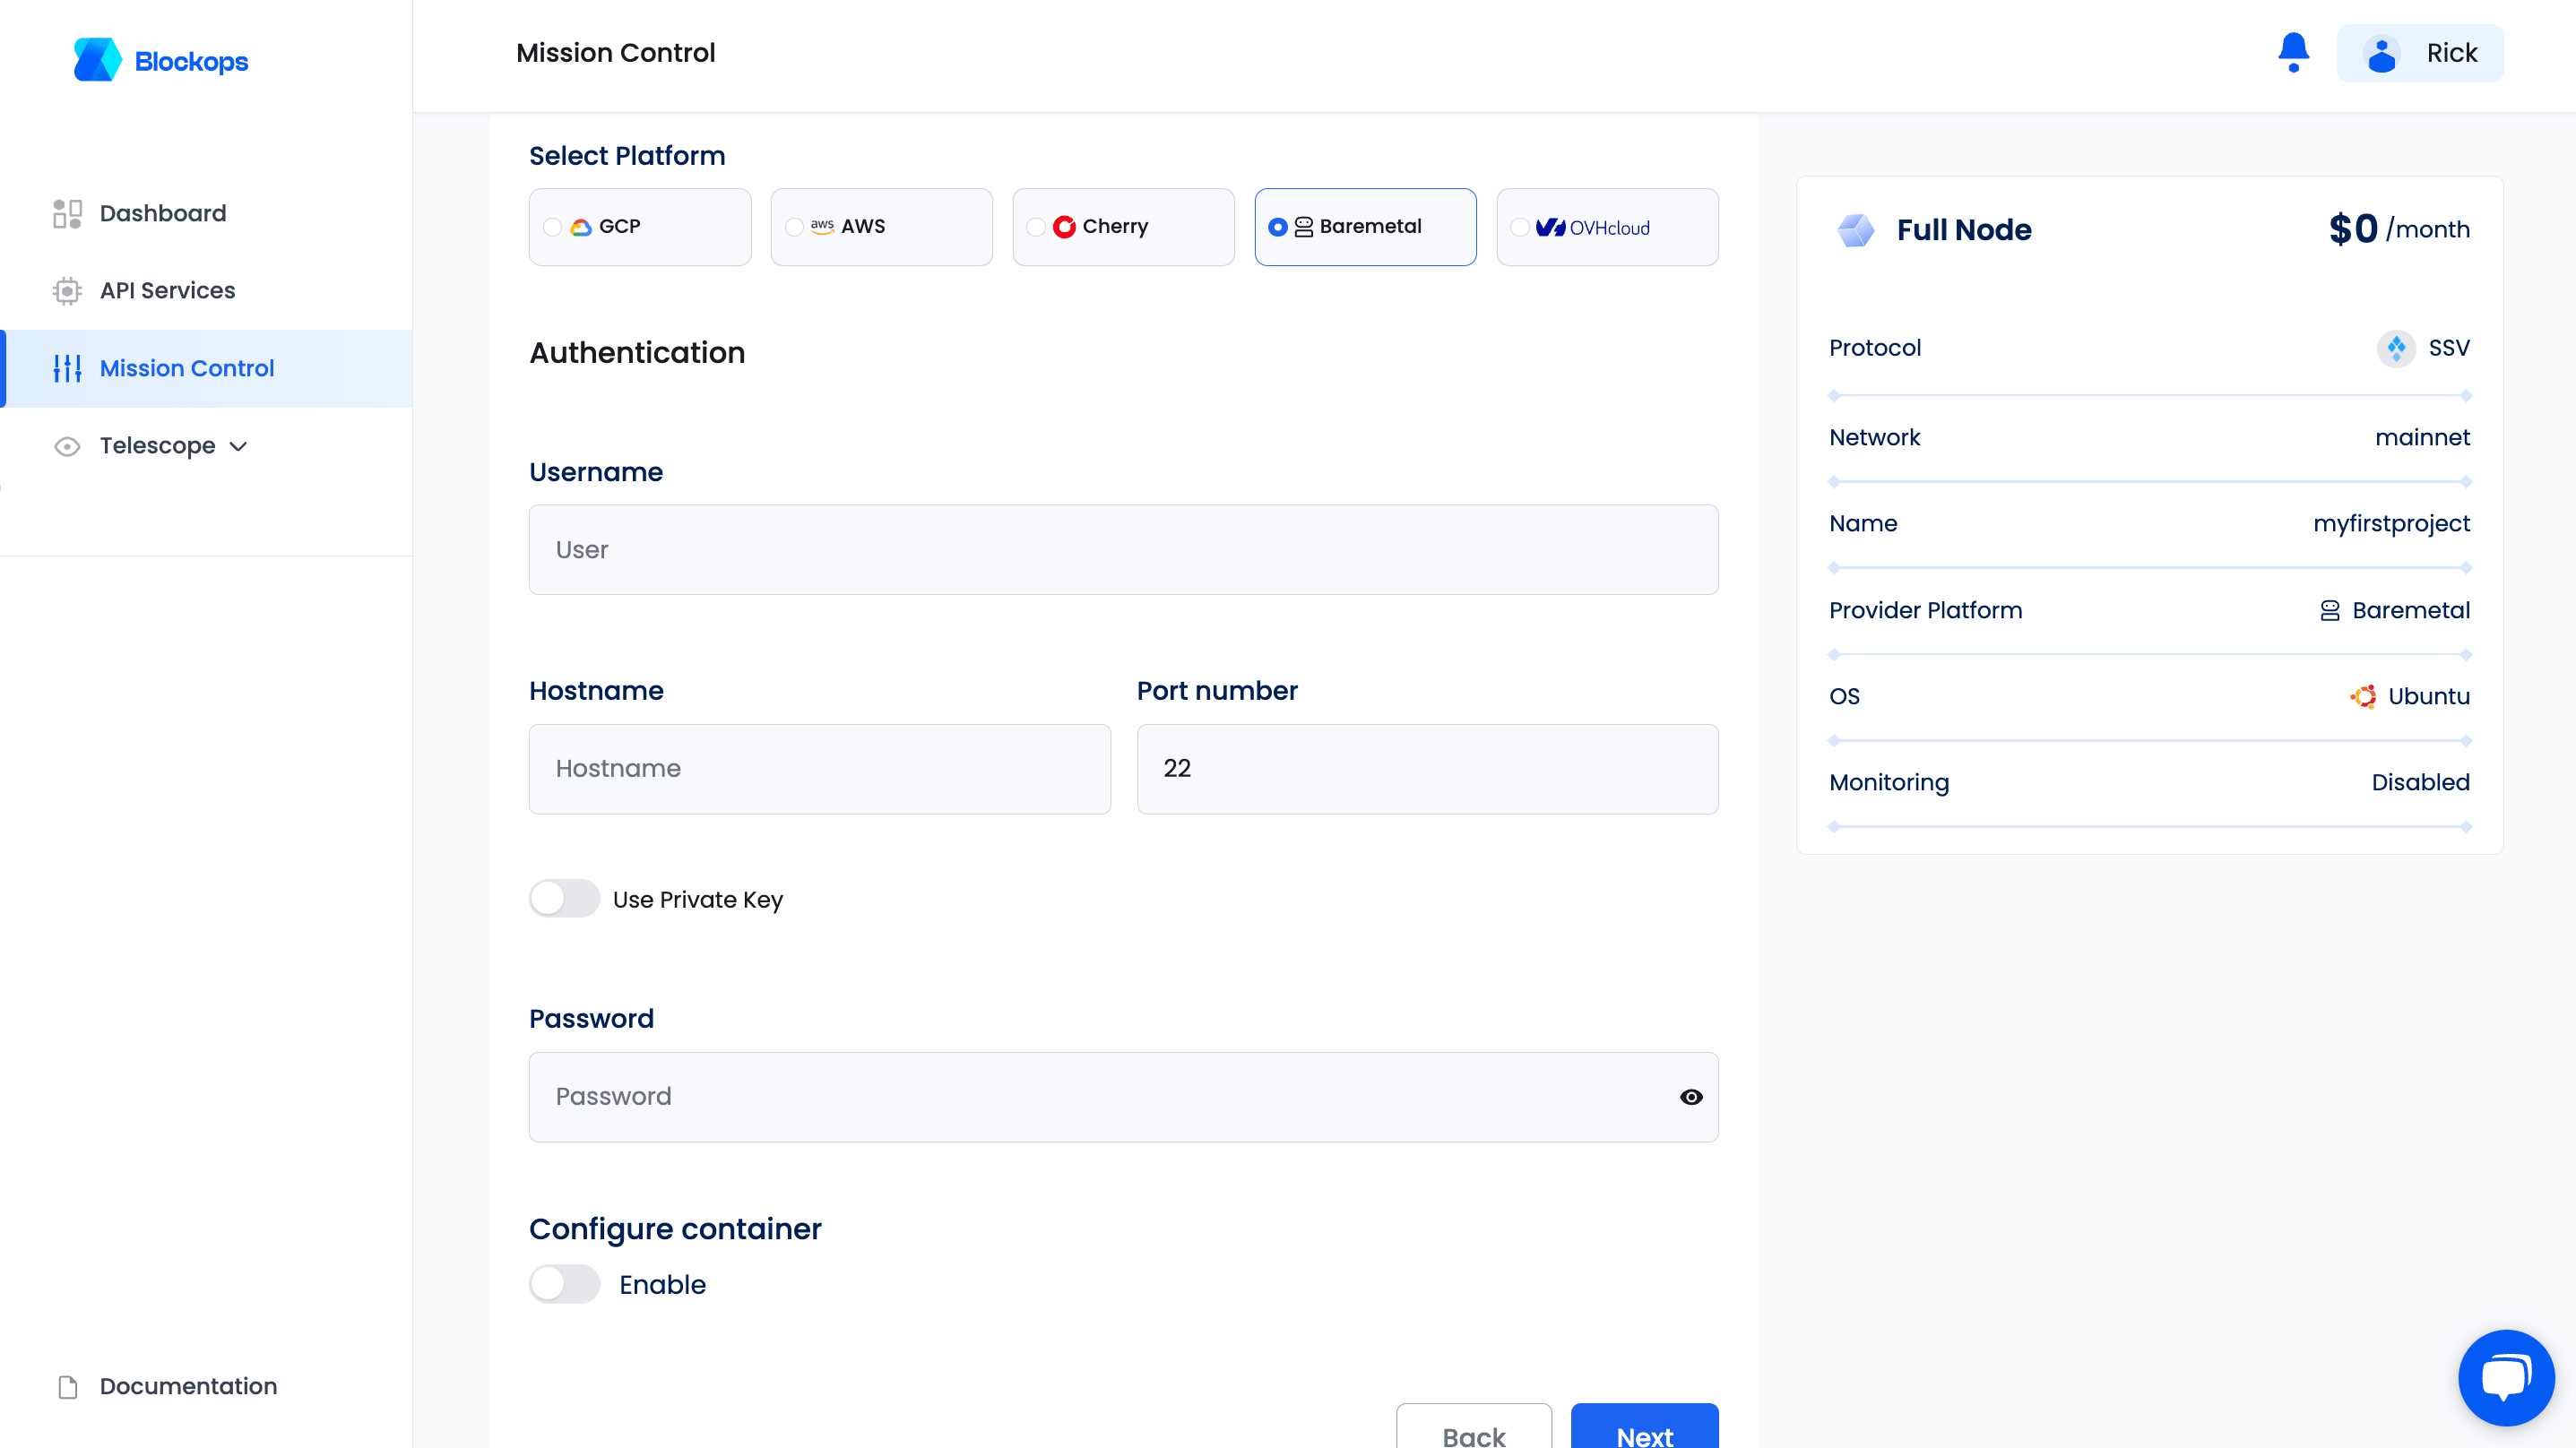
Bare Metal
You are required to provide a username, hostname, port number and password, you have the option of authenticating via SSH by uploading a private SSH Key. Recommended instance size for Bare metalCPU: Dual-core processor (4 cores recommended)
RAM: 16 GB (32 GB recommended)
Storage: 1 TB SSD (2 TB NVMe SSD recommended)
Bandwidth: 10 Mbps stable connection (25 Mbps recommended)
Configure Container
To configure a container, you need to provide a container name, select a restart policy, and choose whether to run as privileged, allocate a buffer for STDIN, or allocate a pseudo-TTY. You also have the option to set commands, arguments, and environment variables.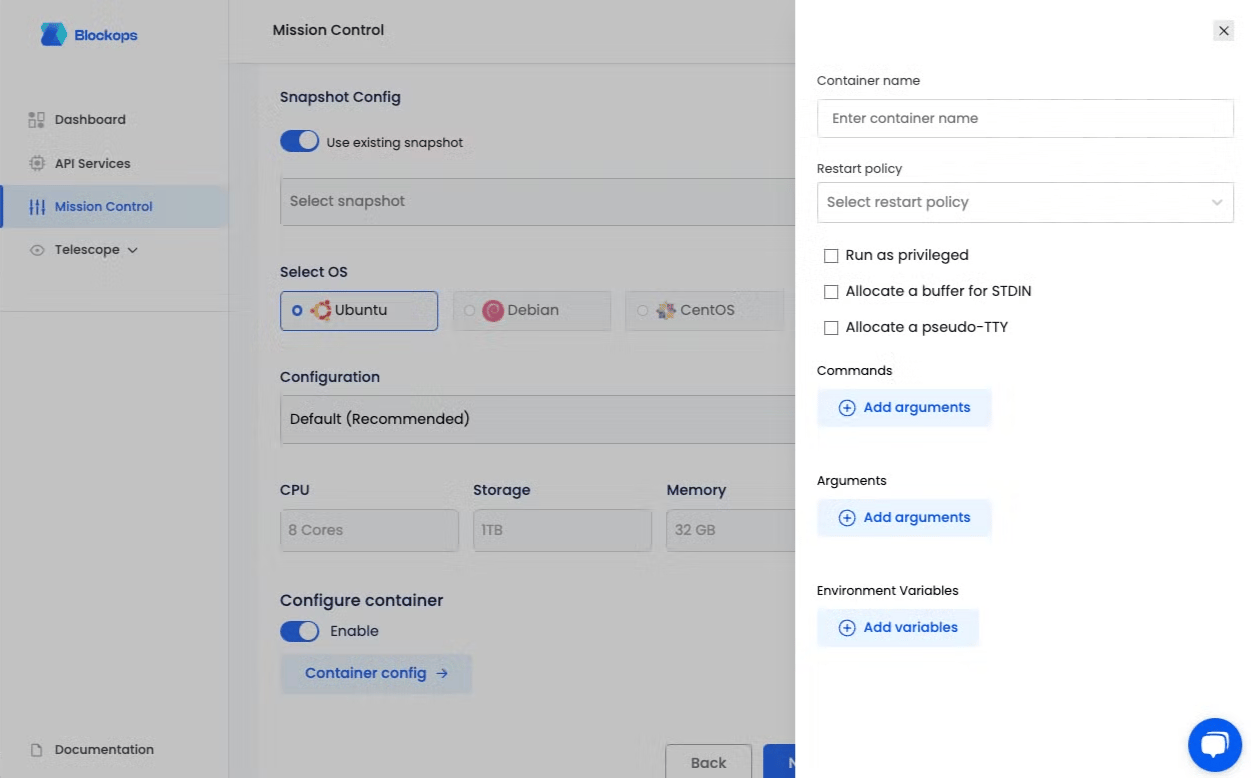
Network Config
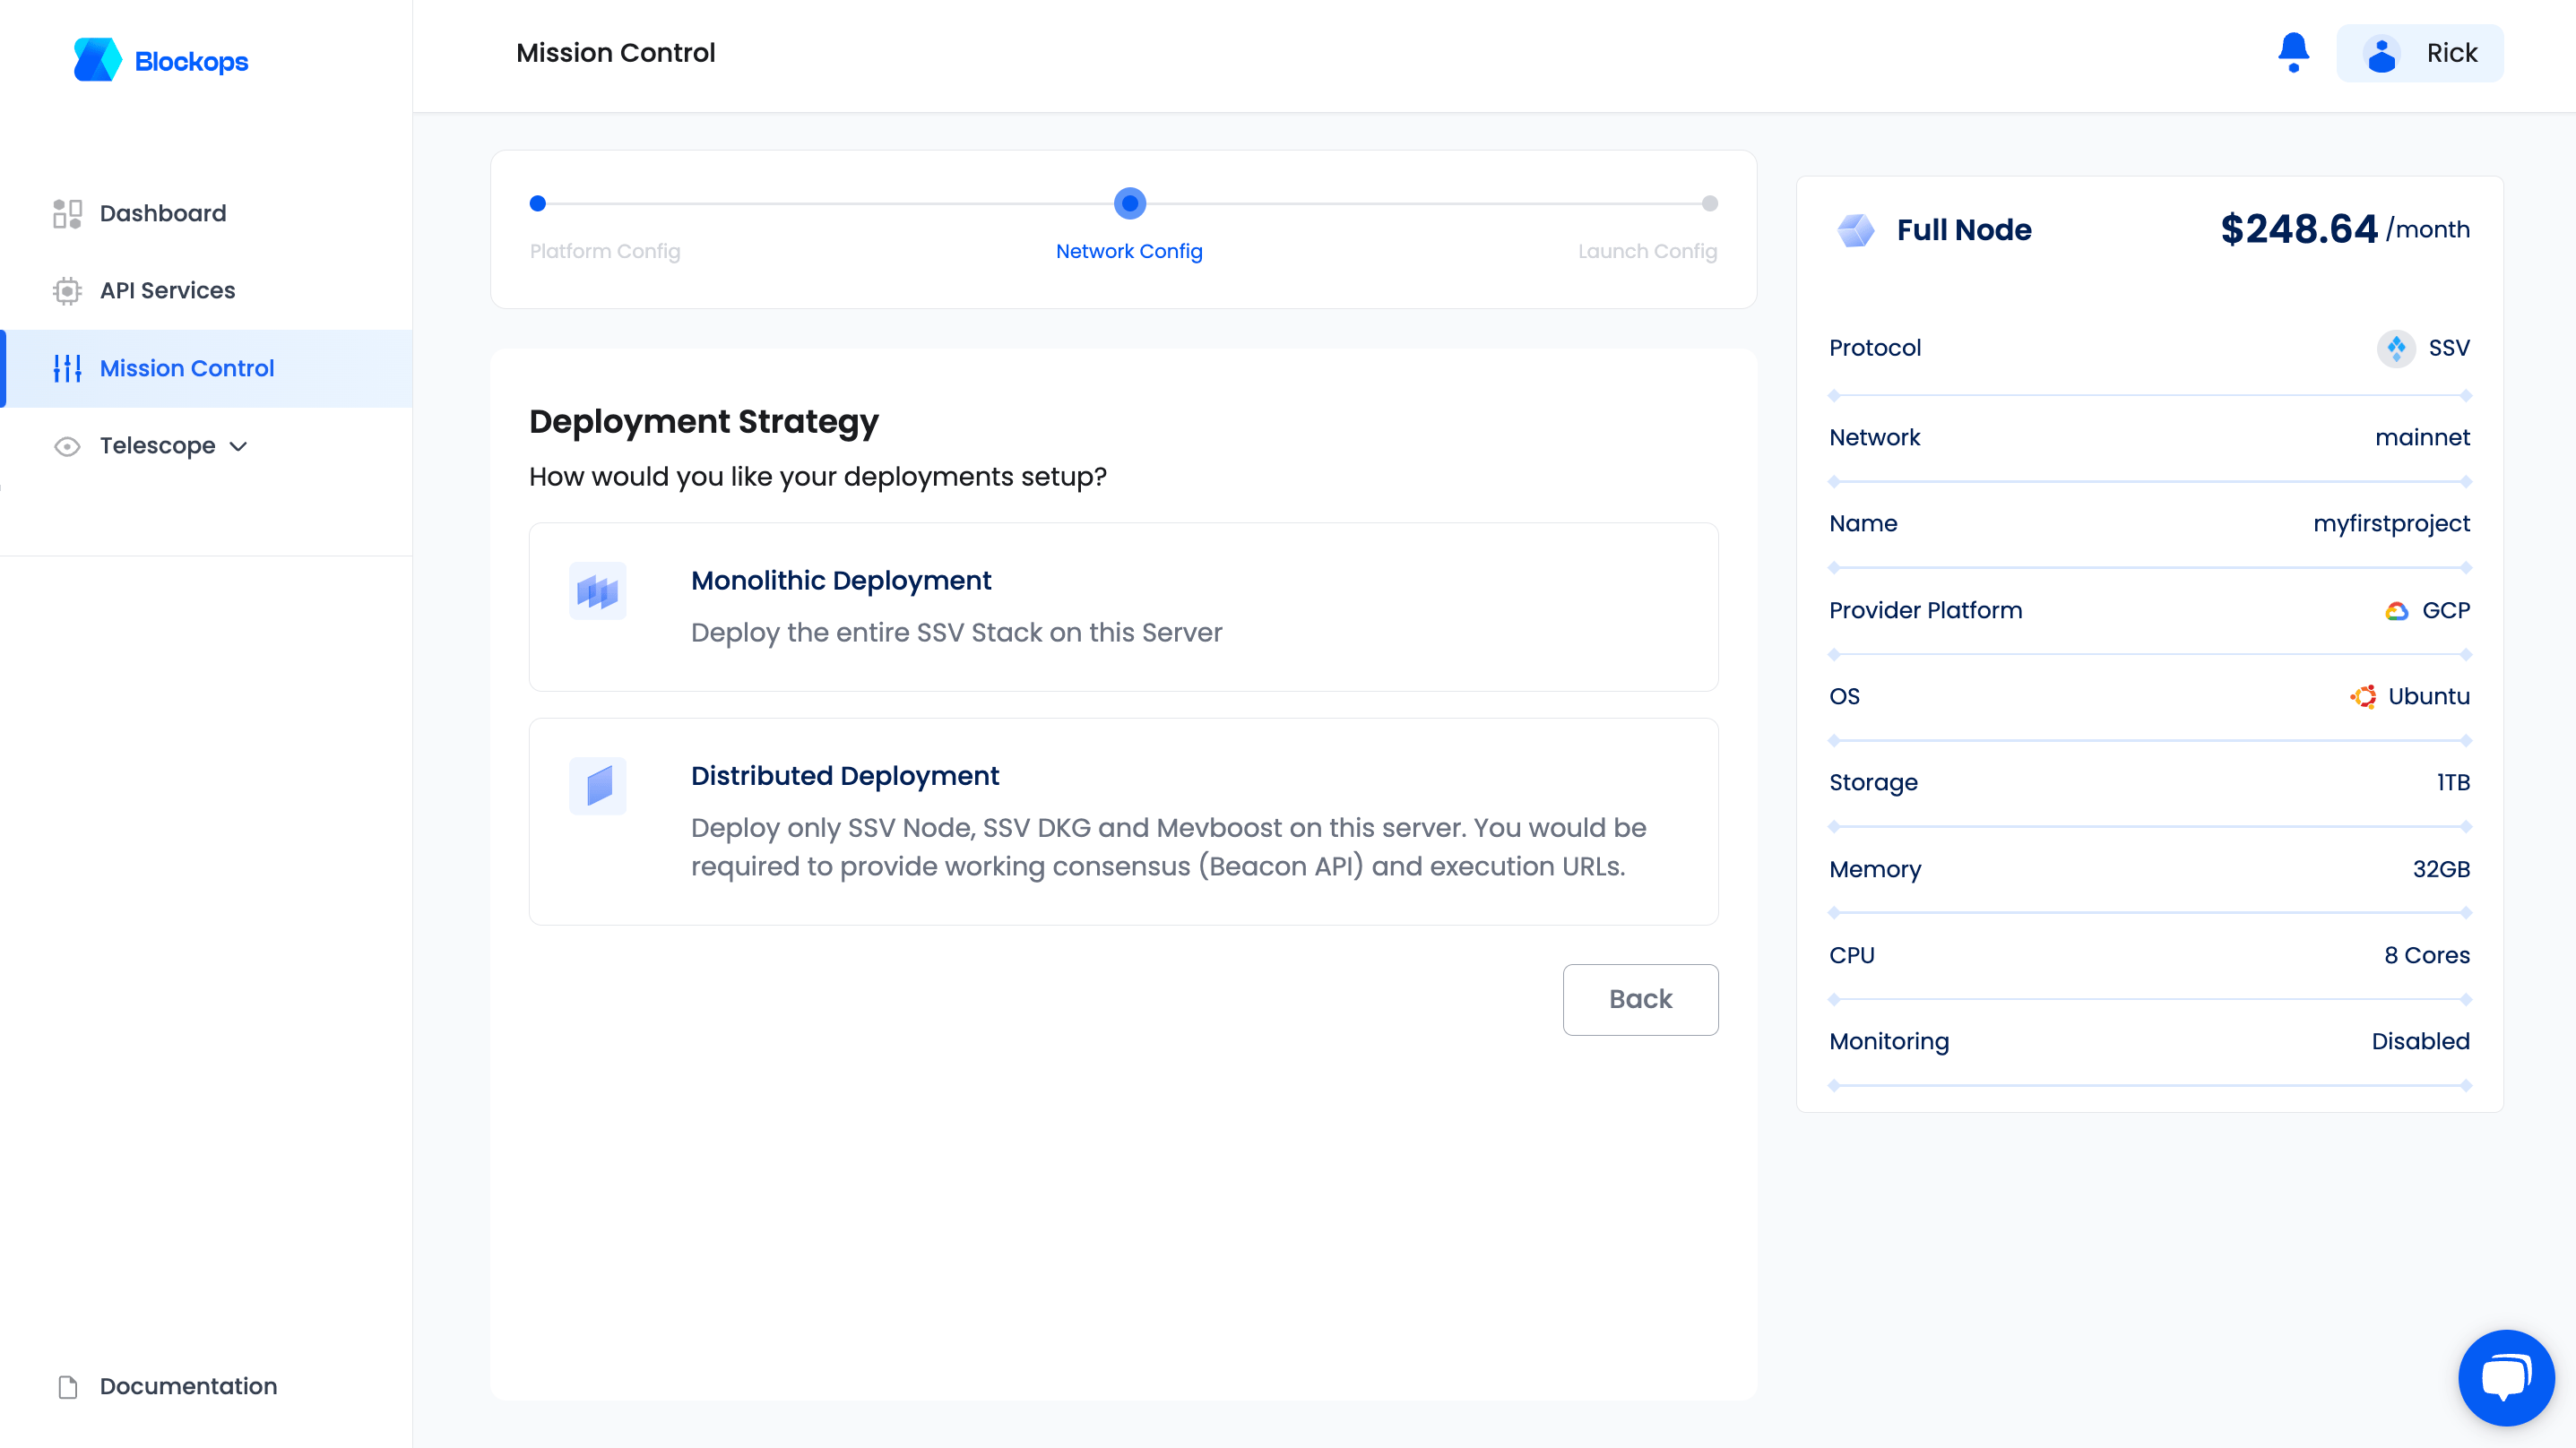
Deployment strategy
- Monolithic deployment: This strategy deploys the created node entirely on Blockops server.
- Distributed deployment: This strategy requires an execution and consensus URL to facilitate deployment on Blockops servers.
DKG credentialsFor operators to properly participate in the SSV protocol’s DKG process, certain credentials and data are needed: • Encrypted private key: The private key of the operator, kept in a file encrypted with a password as a .json file. • Operator password: The operator’s password uploaded as a text file.
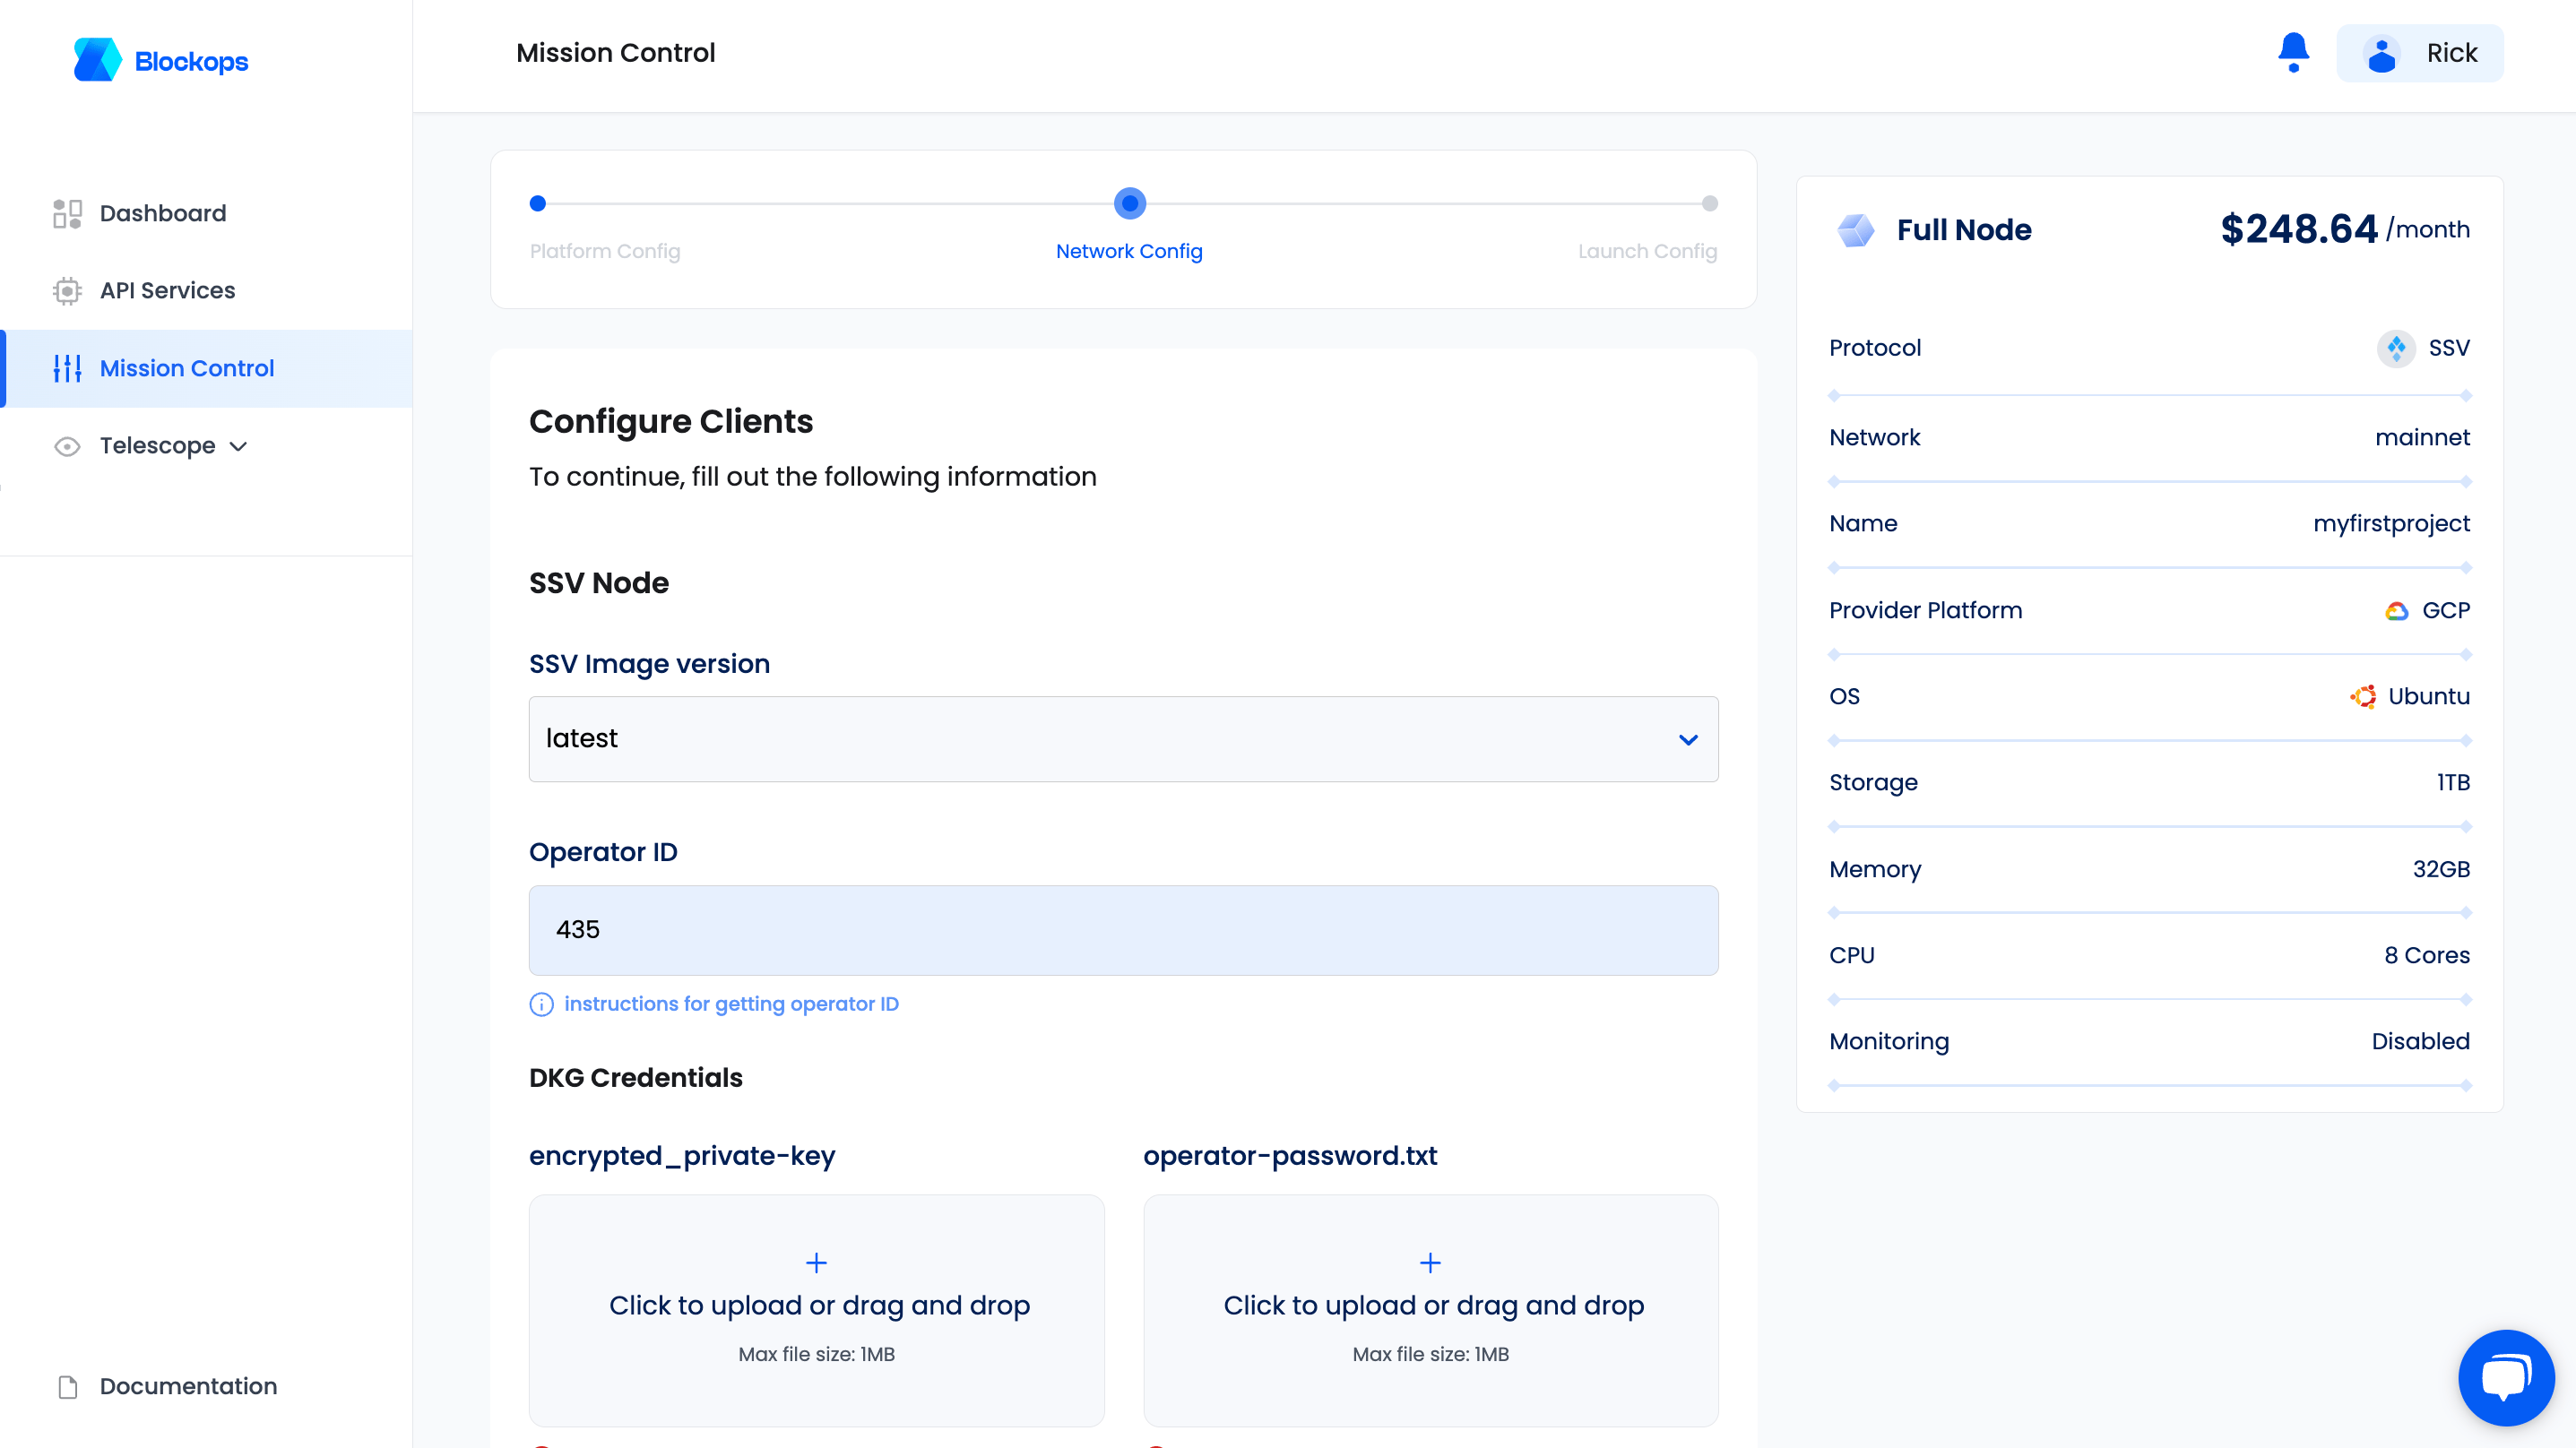
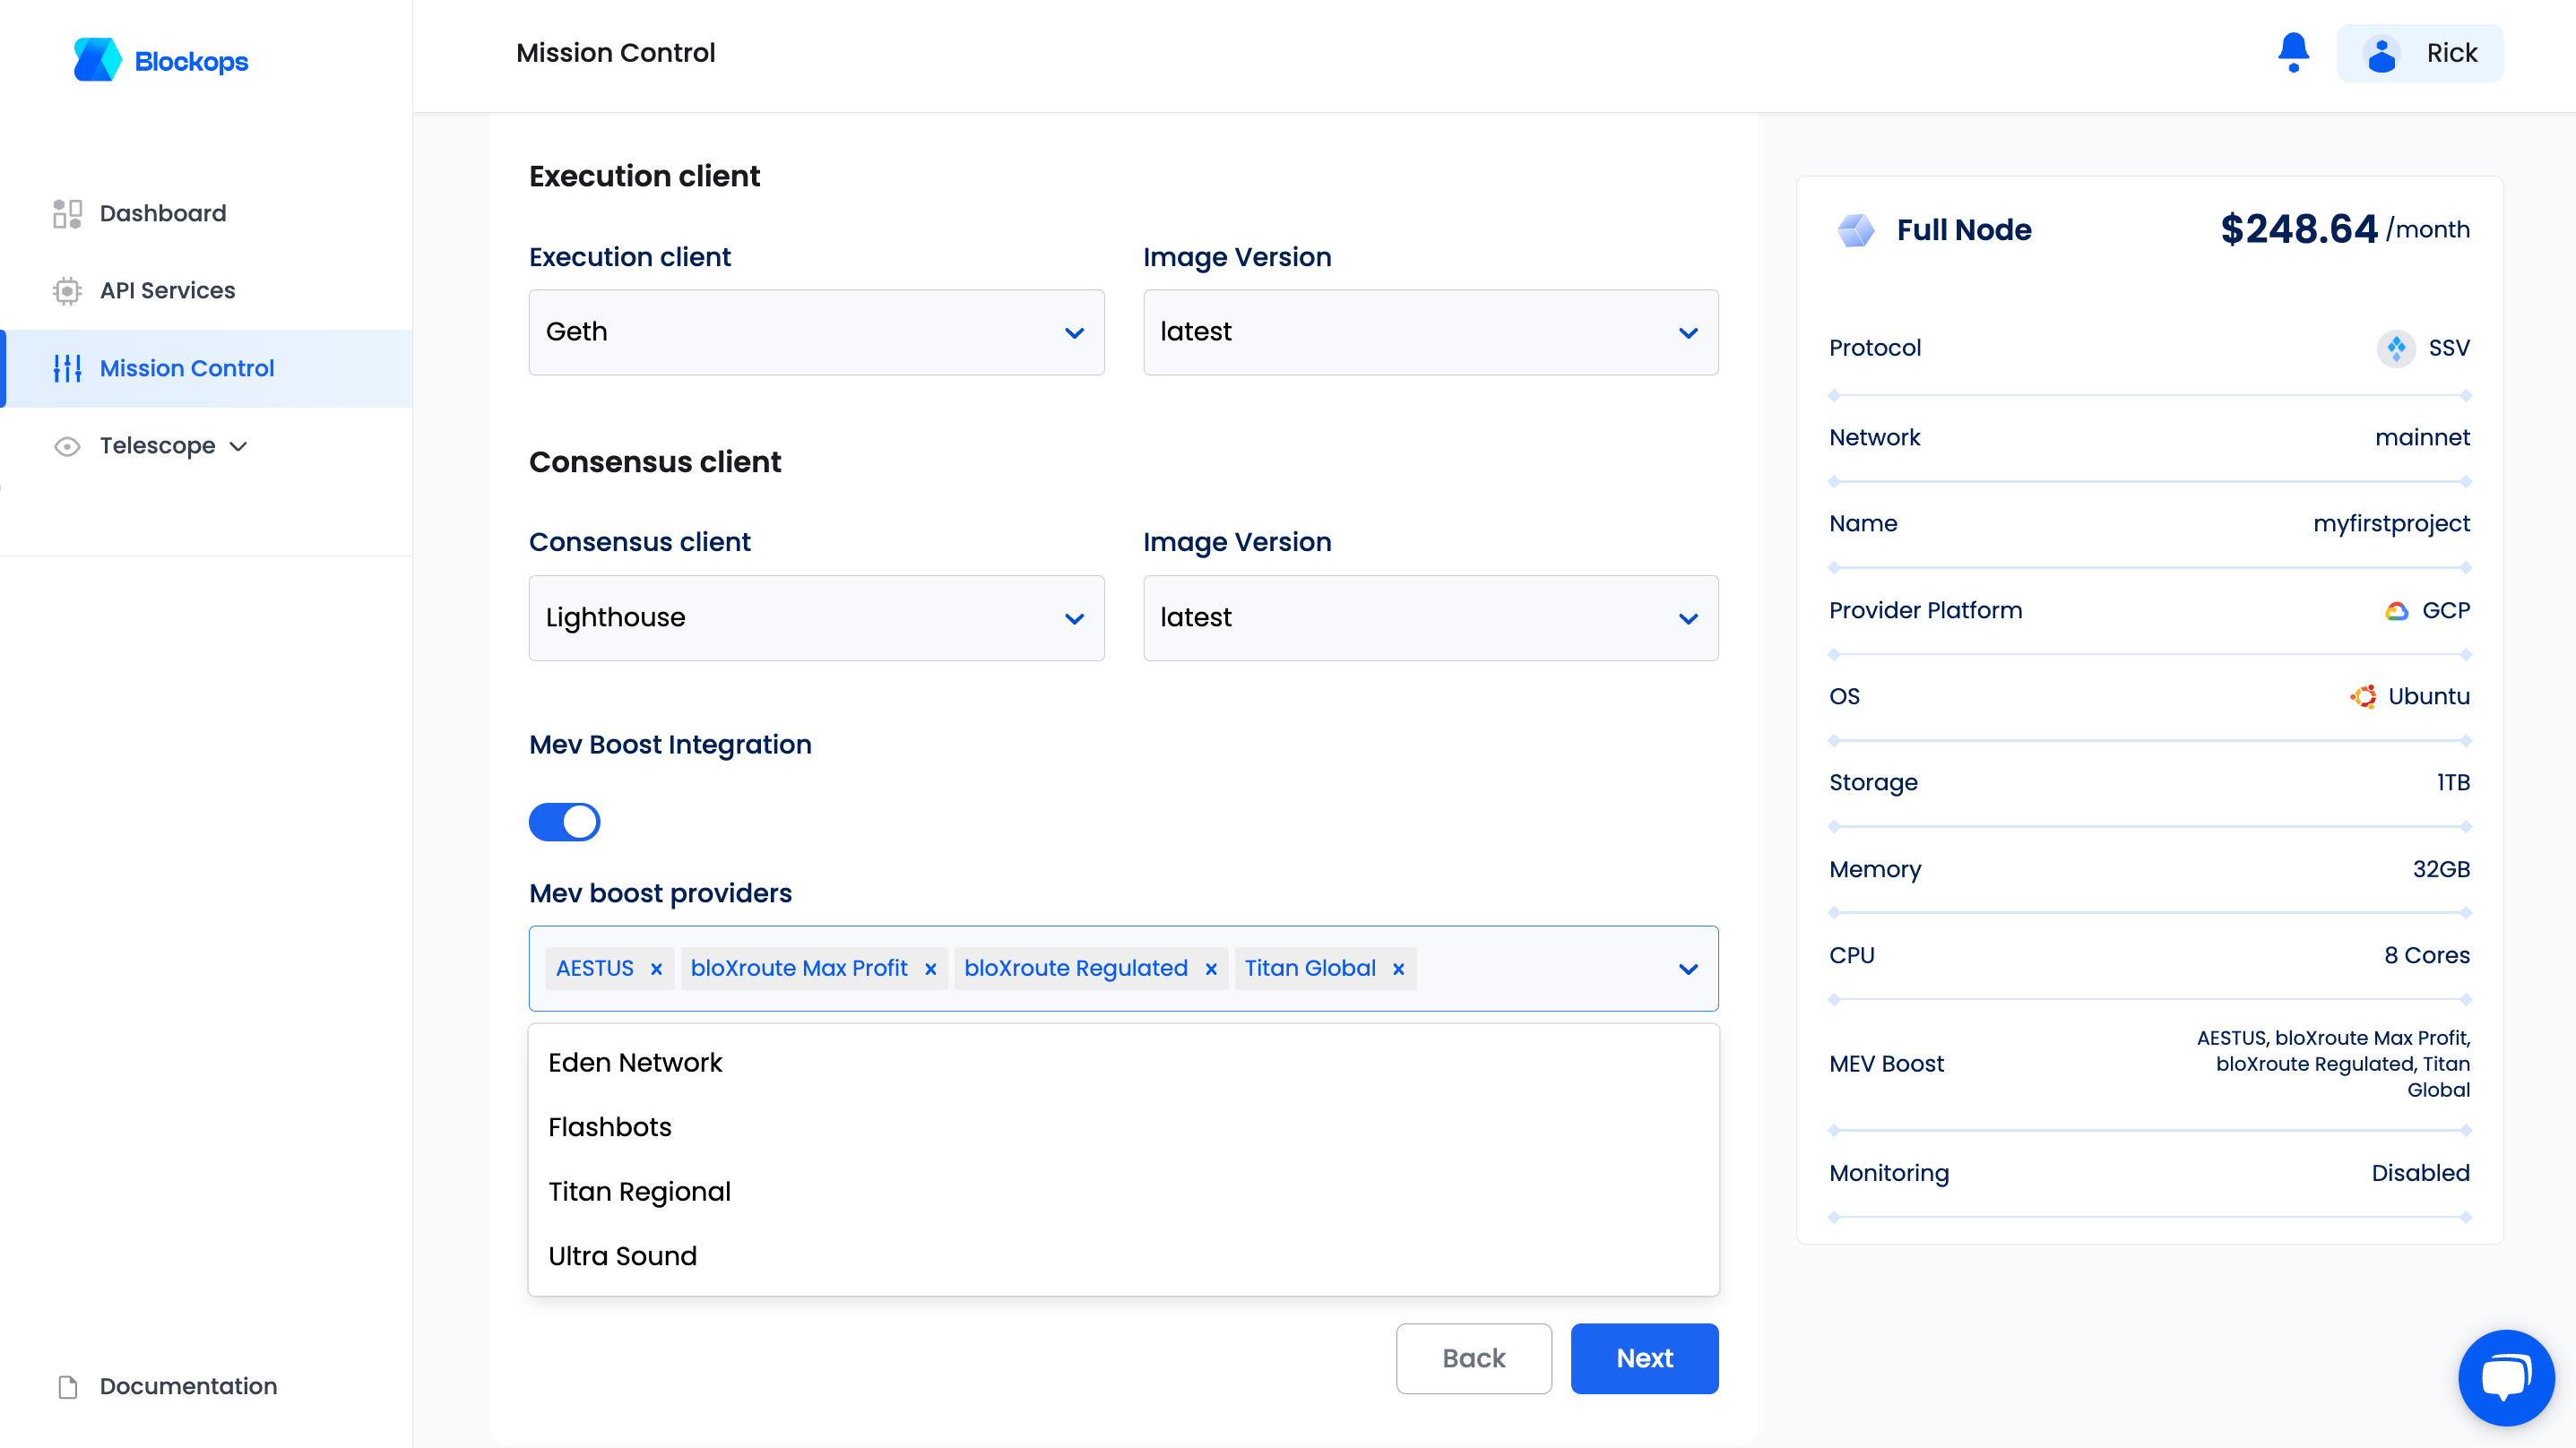
Clients and Image versionsExecution client: To create a node on the SSV network using Blockops servers, you must set up an execution client. This process allows you to select your preferred client and a preferred image version. Consensus client: To create a node on the SSV network using Blockops servers, you must set up a consensus client. This process allows you to select your preferred client and a preferred image version.
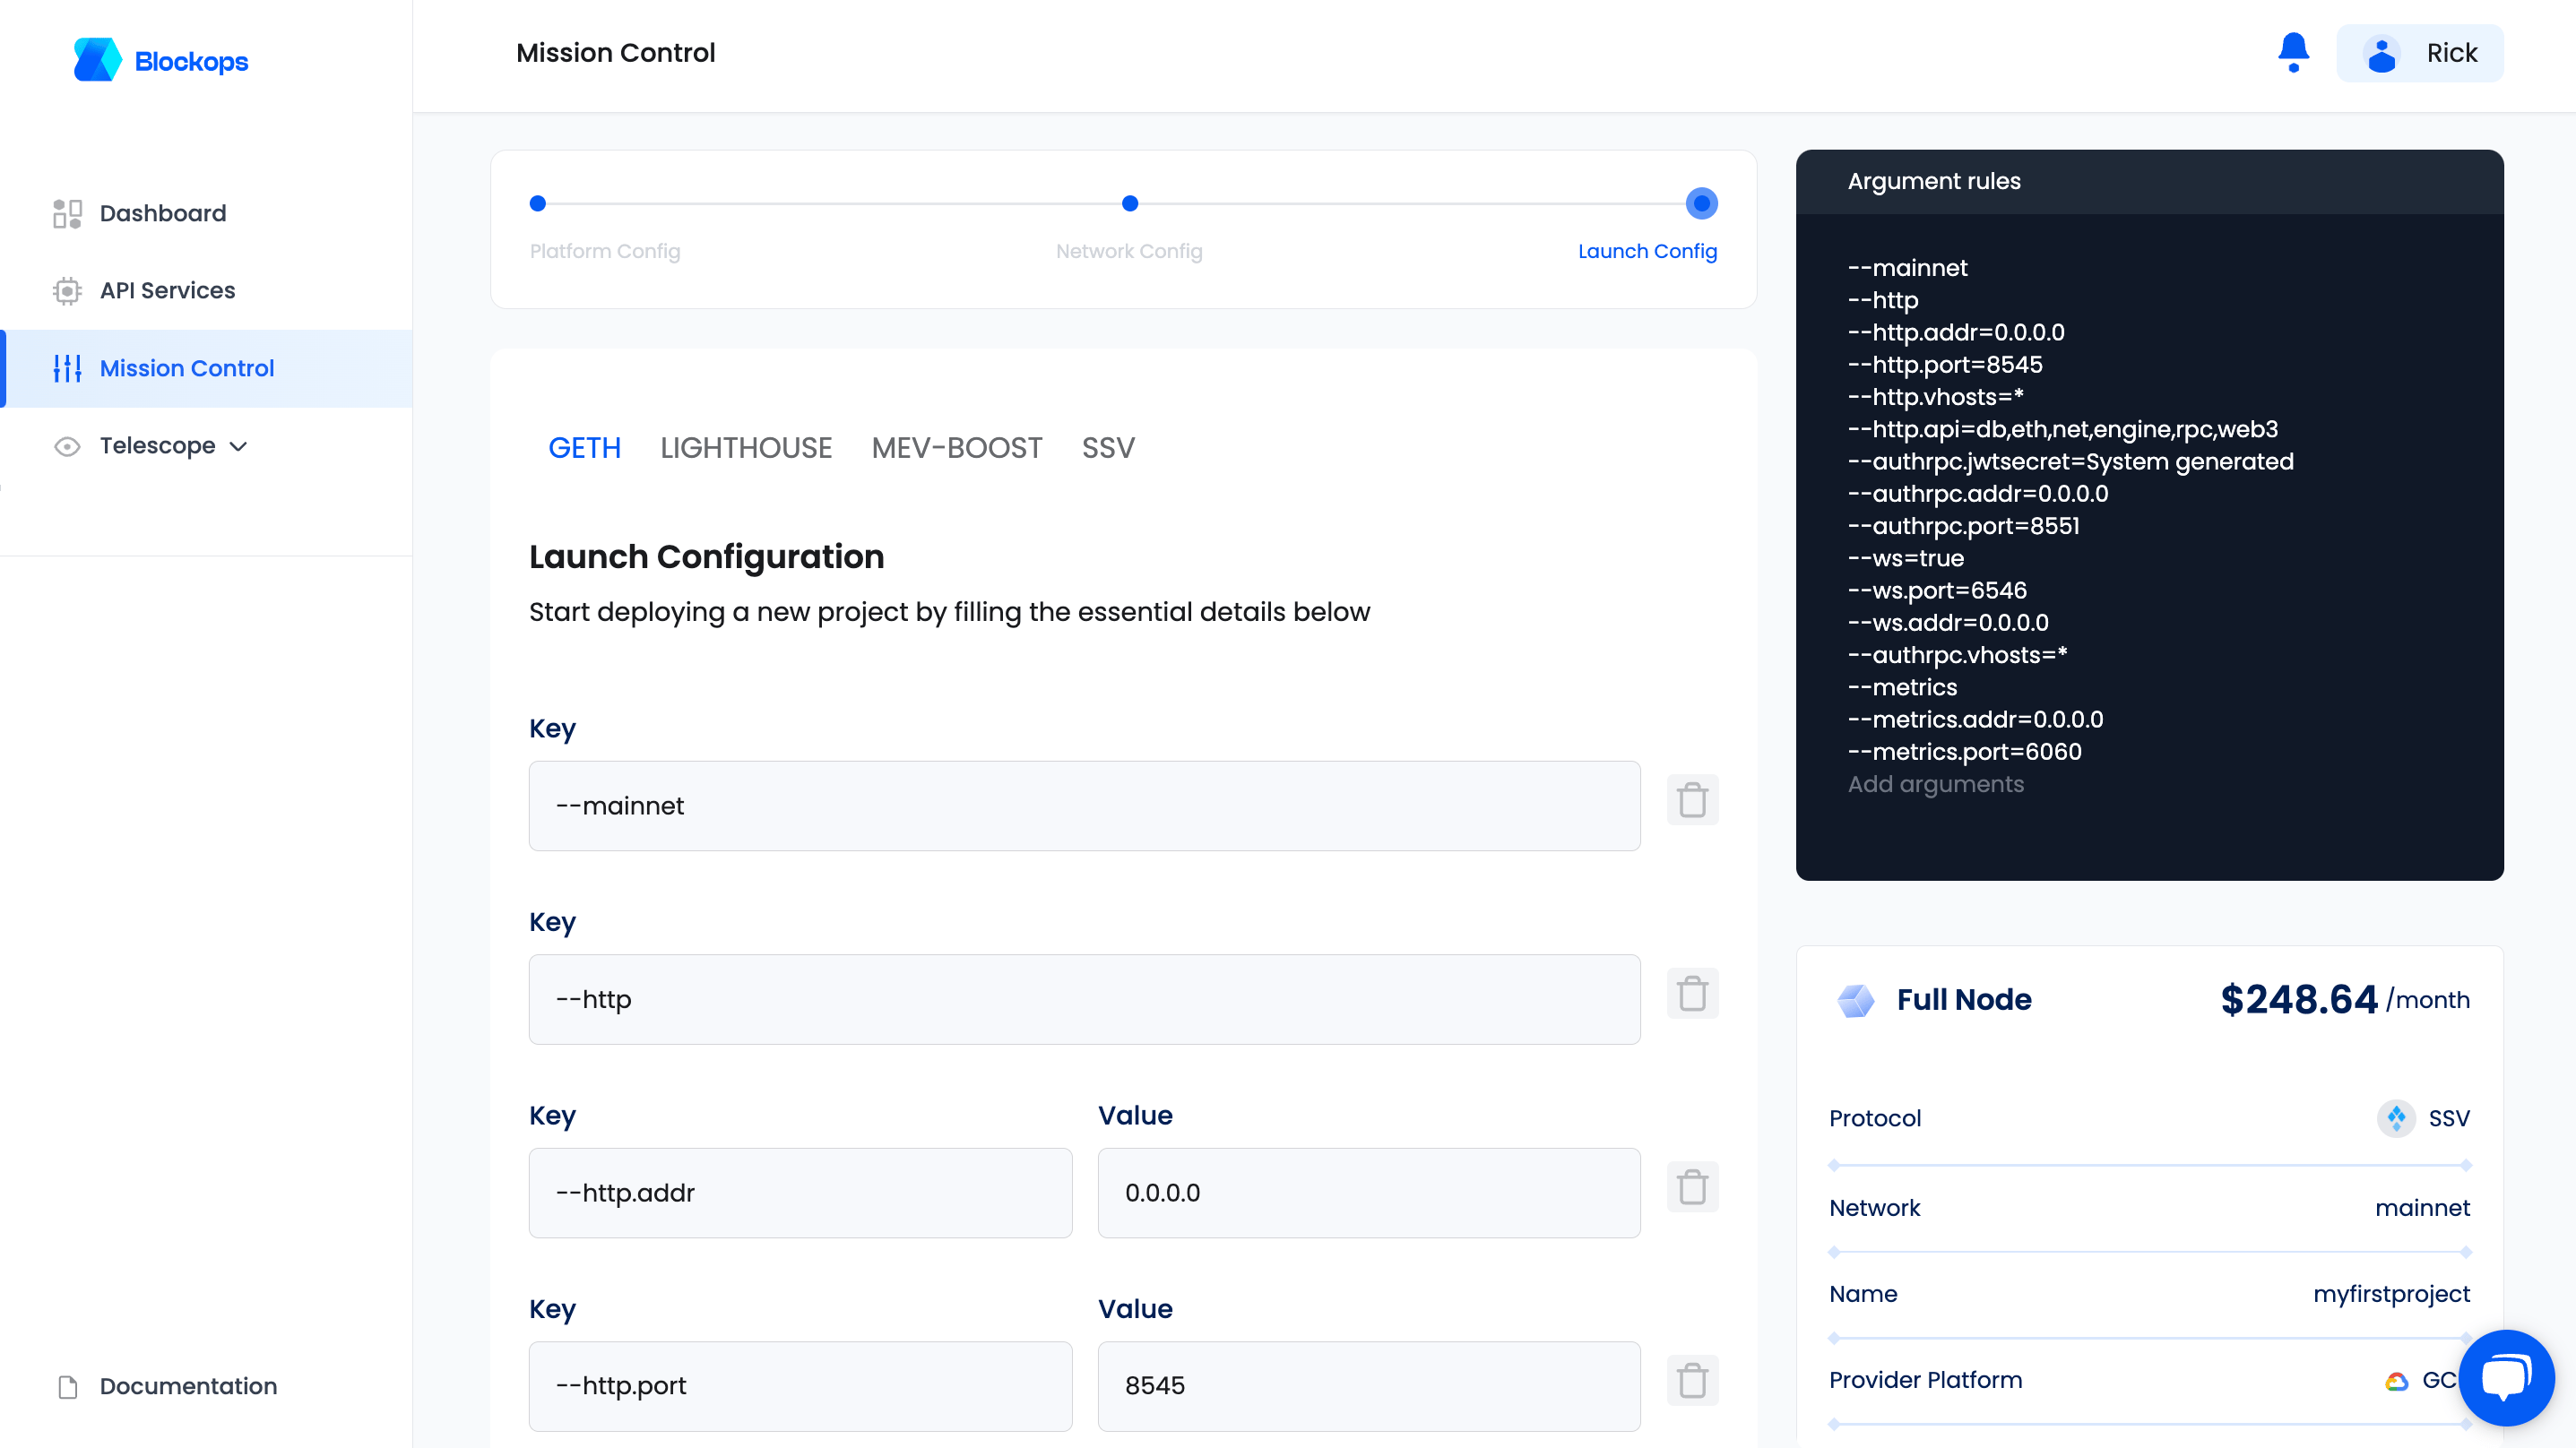
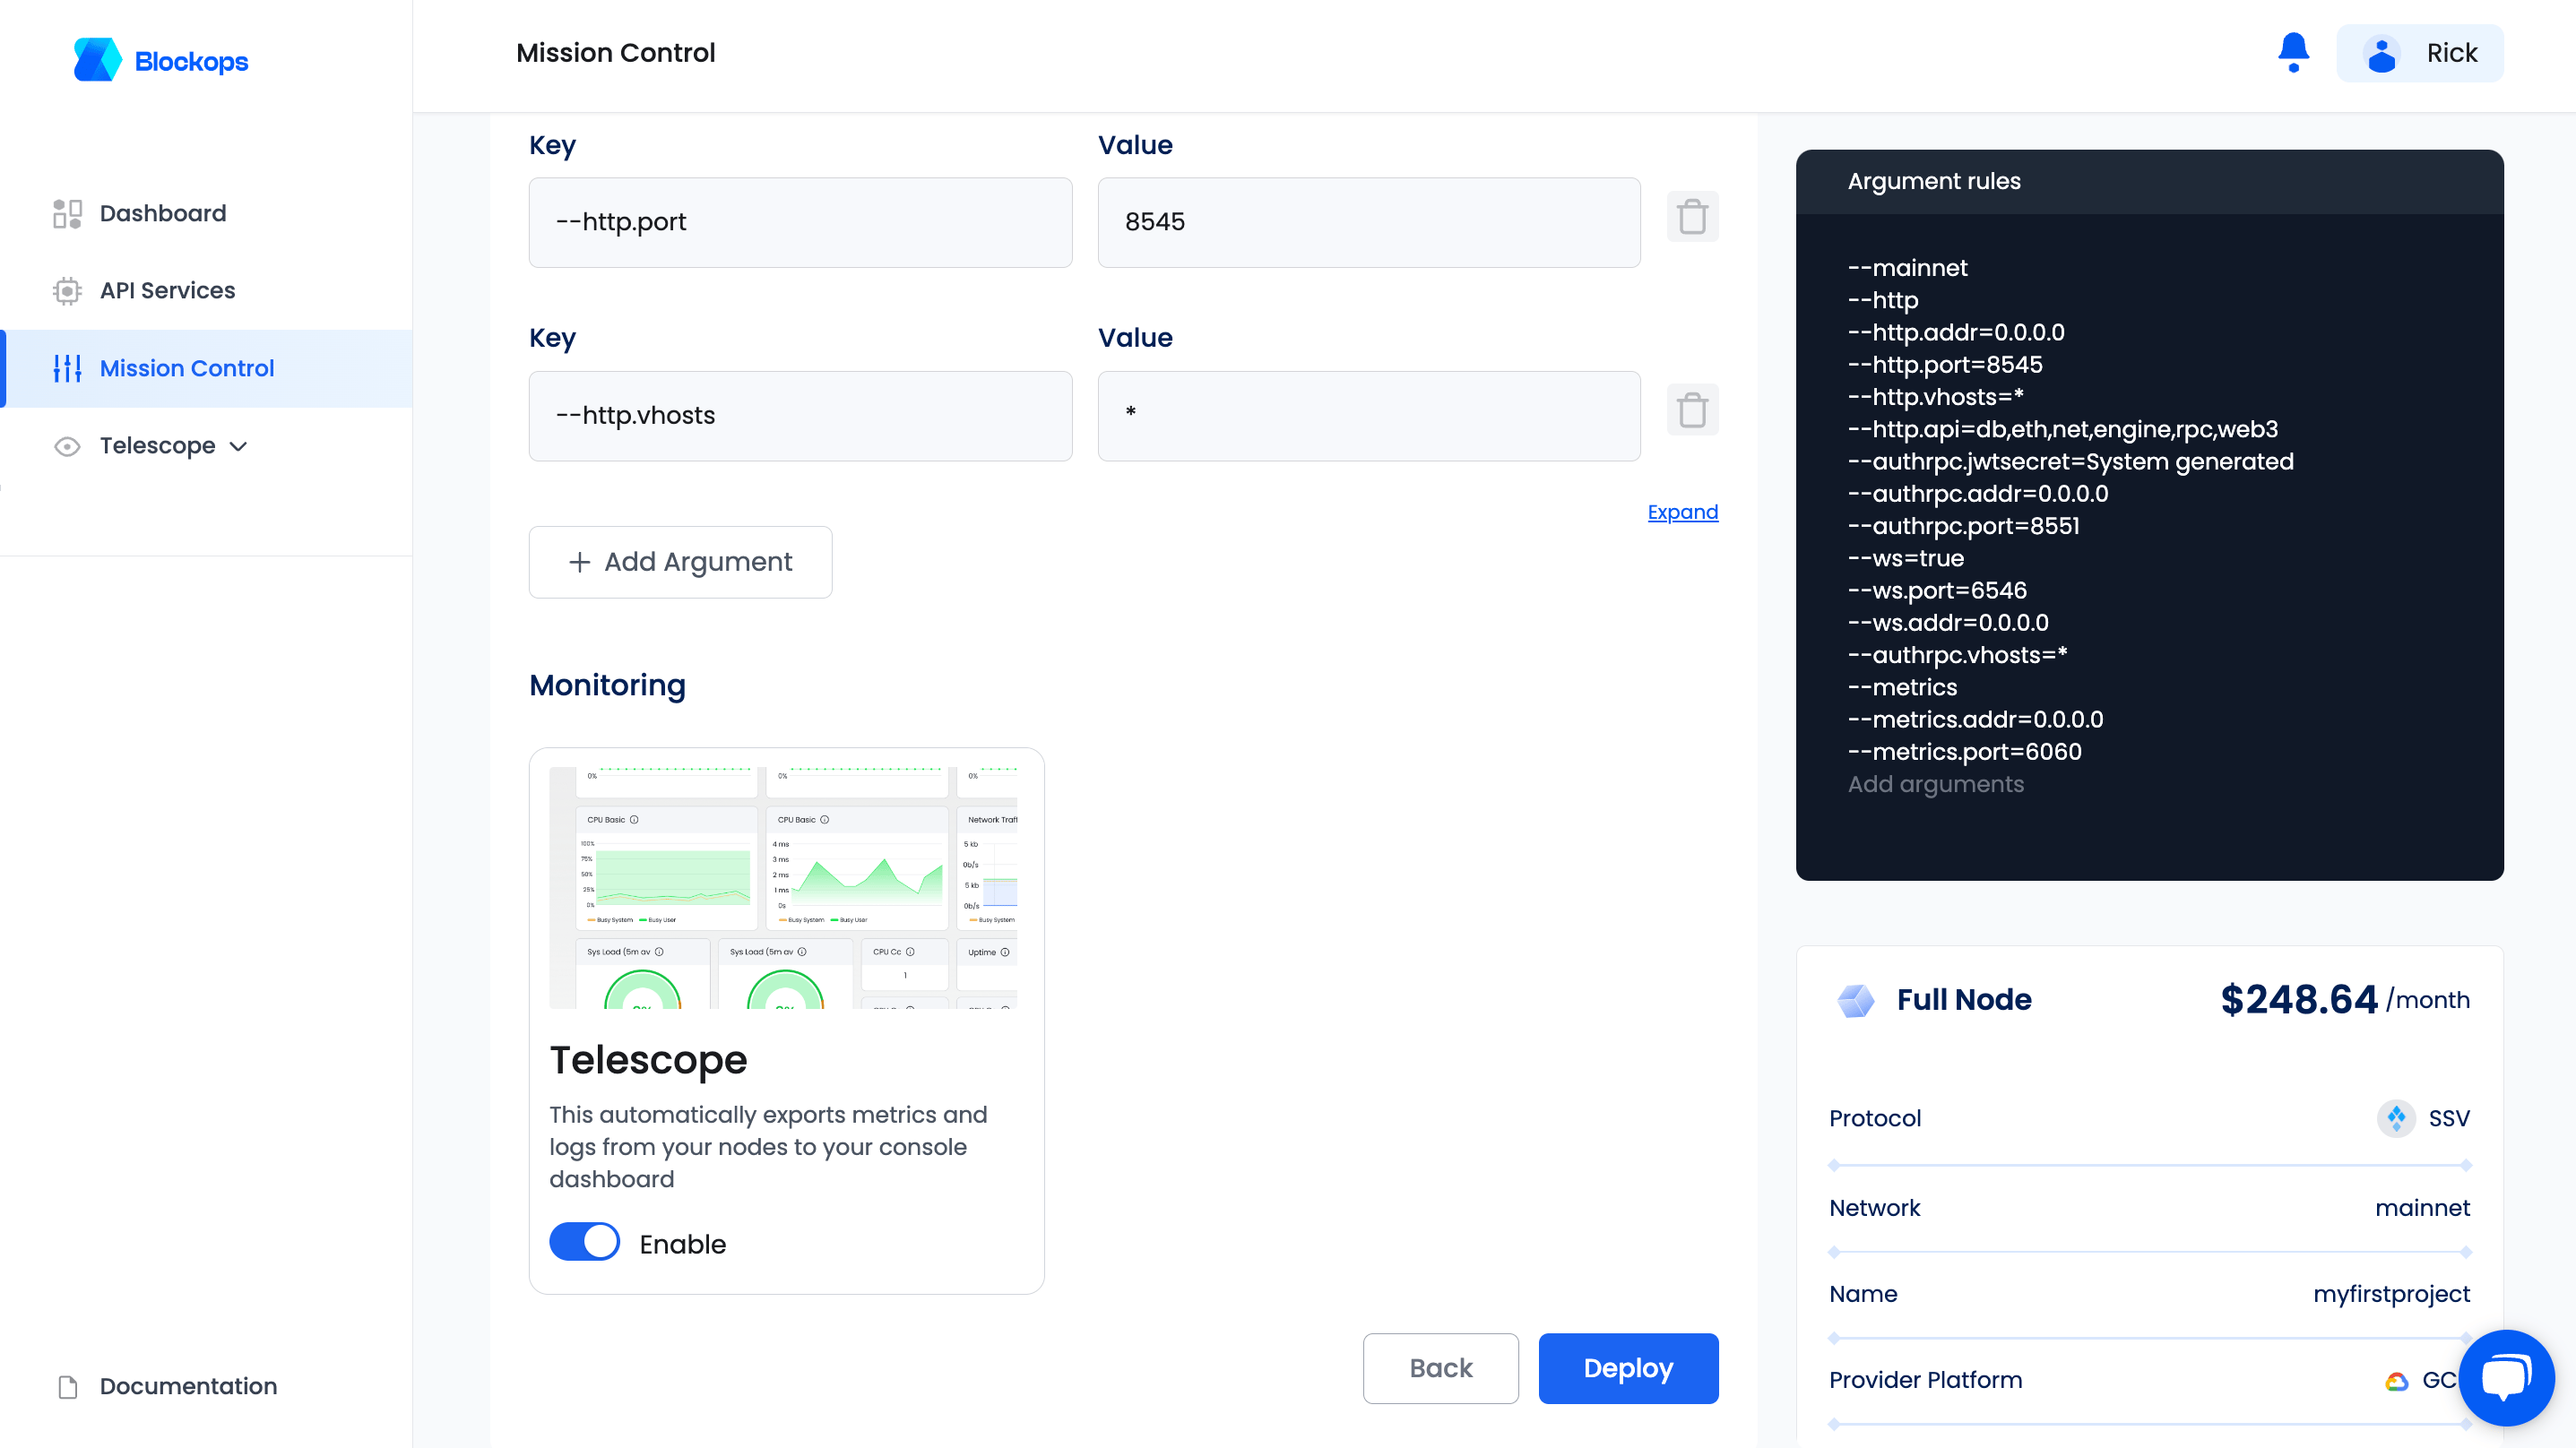
Launch Config
Deployed Node
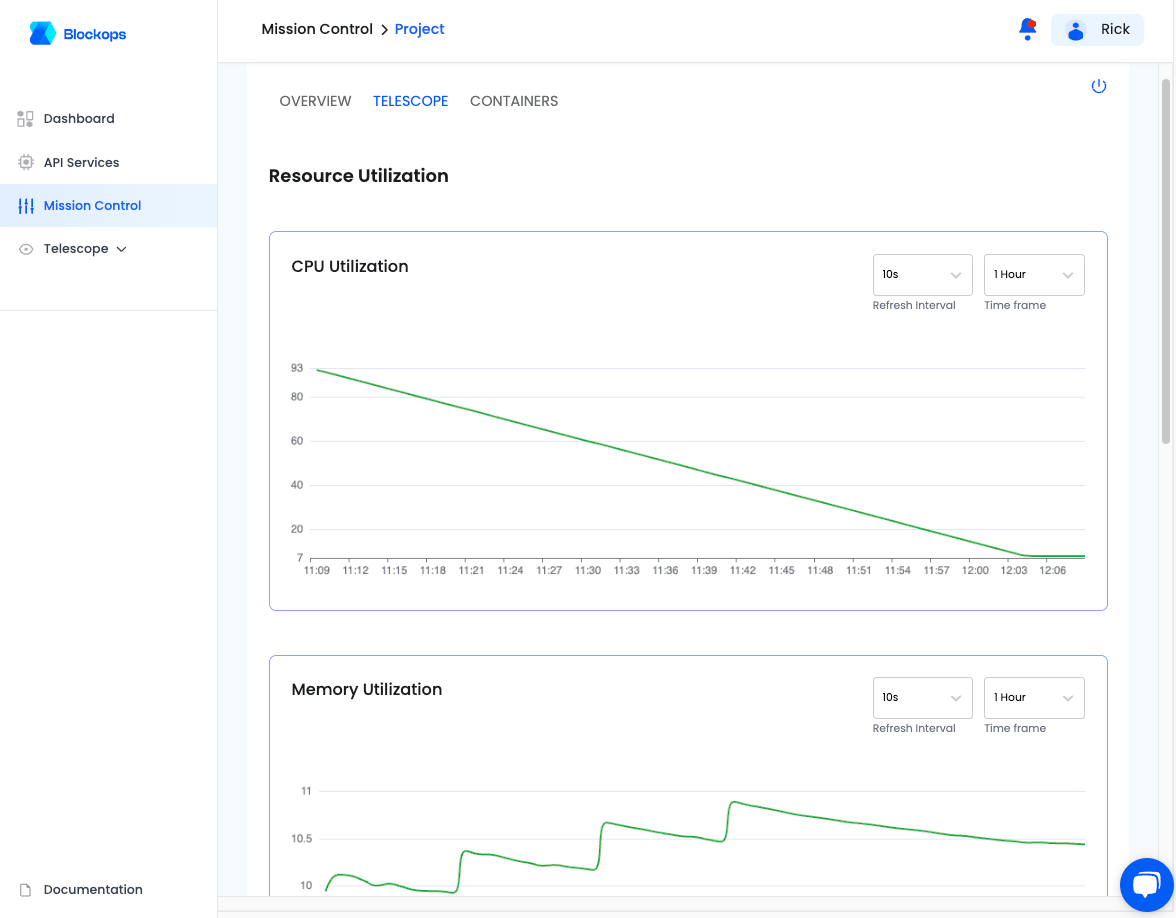
Once a node is deployed successfully, the resource utilisation can be tracked on the dashboard alongside enabled containers.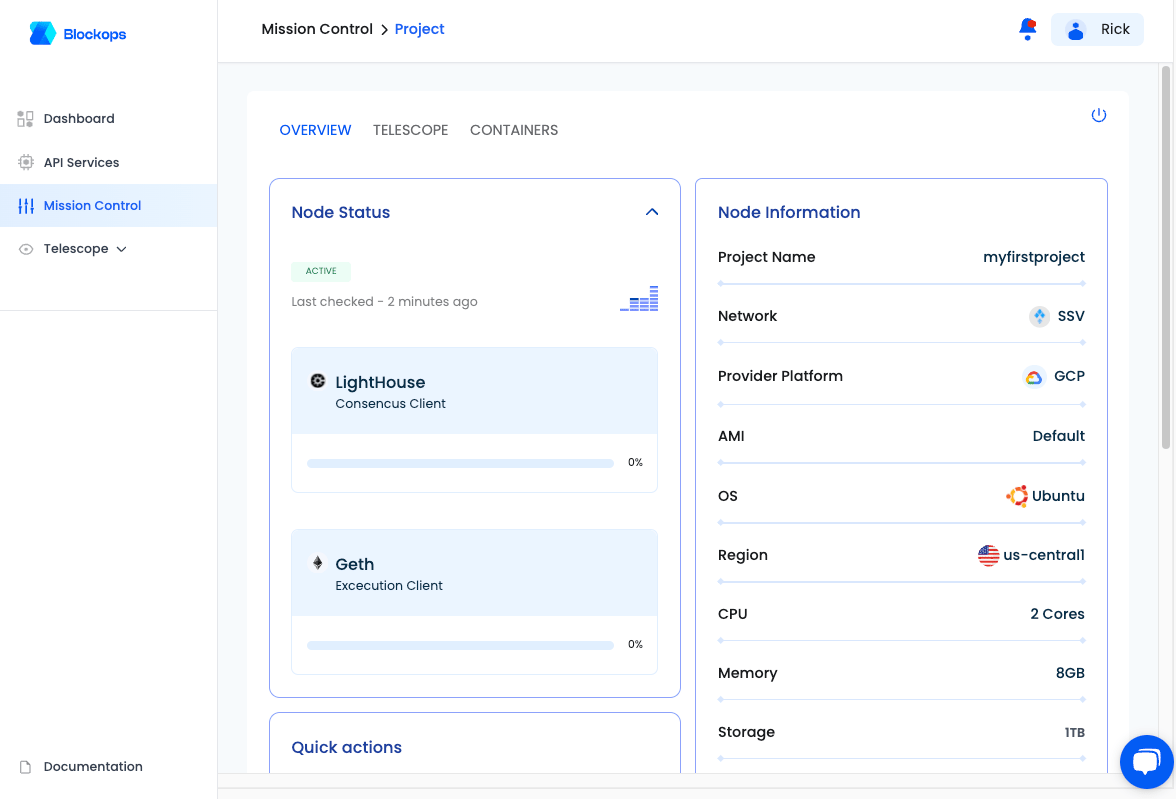
Support
Support can be accessed via the support icon at the bottom right of the dashboard or contact us at hello@blockops.networkFollow us on Twitter for more information on upcoming protocols and developments.